


- Set up automatic WordPress backups, for free, using UpdraftPlus
- Discover my best practices for taking and retaining backups
- Learn about my preferred Hosting platform, and how to set up automatic WordPress backups there (hint: Just sign up!)
Why take automatic WordPress backups?
For the exact same reason that you keep backups of your local computer files: When disaster strikes, a backup can bail your ass out.
You never know when something unexpected will go wrong.
Some examples I’ve encountered:
- A client left their laptop out in the rain
- A colleague inadvertently deleted their entire work database
- I made a major data change to a website which broke the site. Couldn’t figure out how to undo it.
Plus, a host of other ‘normal’ scenarios, like a clients’ machines getting infected with viruses.
It’s 100% possible for your live site to encounter some kind of disaster — from someone purposely compromising (hacking) your site, to you clicking the wrong button at the wrong time.
When that happens, a backup is the only way to bail your ass out. Well, beyond starting from scratch.
And, ultimately, the best types of backups are the ones you set and forget. In other words, automatic WordPress backups are the Ronco Showtime Rotisserie of the web.
Best practices for automatic WordPress backups
I have a few recommendations for all tech backups. Automatic WordPress backups are no different.
1. Have two full backups
Yep, two.
It should be rare that you need to use second backup. But, I have had occasions when I’ve been very grateful I had the second.
In those situations, something was strange about the first (i.e., a file was corrupted), and the second one allowed me to fix it.
2. Store them in separate locations
If you store both backups in the same place (i.e., on the same server with your website), and there’s a catastrophic issue on that server, you lose both backups.
You want to be sure that you’re storing one backup in another location. A cloud storage tool (like Google Drive or OneDrive) is my go-to.
3. Take at least one backup per day
The more frequently you take backups, the less re-work you’ll have to do if something goes wrong.
At minimum, you want to keep a full backup daily in at least one of your storage locations. Ideally, you’d have a full daily backup in two locations.
4. Keep a minimum of five copies
This may vary slightly depending on the size of your site. But, I recommend keeping at least five full backups on hand at all times.
Again, ideally, I’d recommend that this be the case in both storage locations.
5. Take backups when traffic is lowest
Finally, backups take resources that’d ordinarily be available for your site’s users. It’s a good idea to schedule automatic WordPress backups to happen when the fewest people are on your site.
This will, of course, vary by site. But, most common is the middle of the night, around 2am, for your highest-traffic time zone.
Automatic WordPress backups with your Hosting provider
Some Hosting providers have features that take automatic WordPress backups. I’d check in with your Host to see if this is a tool they offer.
I can’t give a ton of specific instructions here because each Hosting provider has different options.
But, I can quickly mention that SiteGround, my preferred Hosting platform, makes automatic backups effortless.
You don’t have to do a thing. Once your Hosting is set up, daily backups are automatically taken.
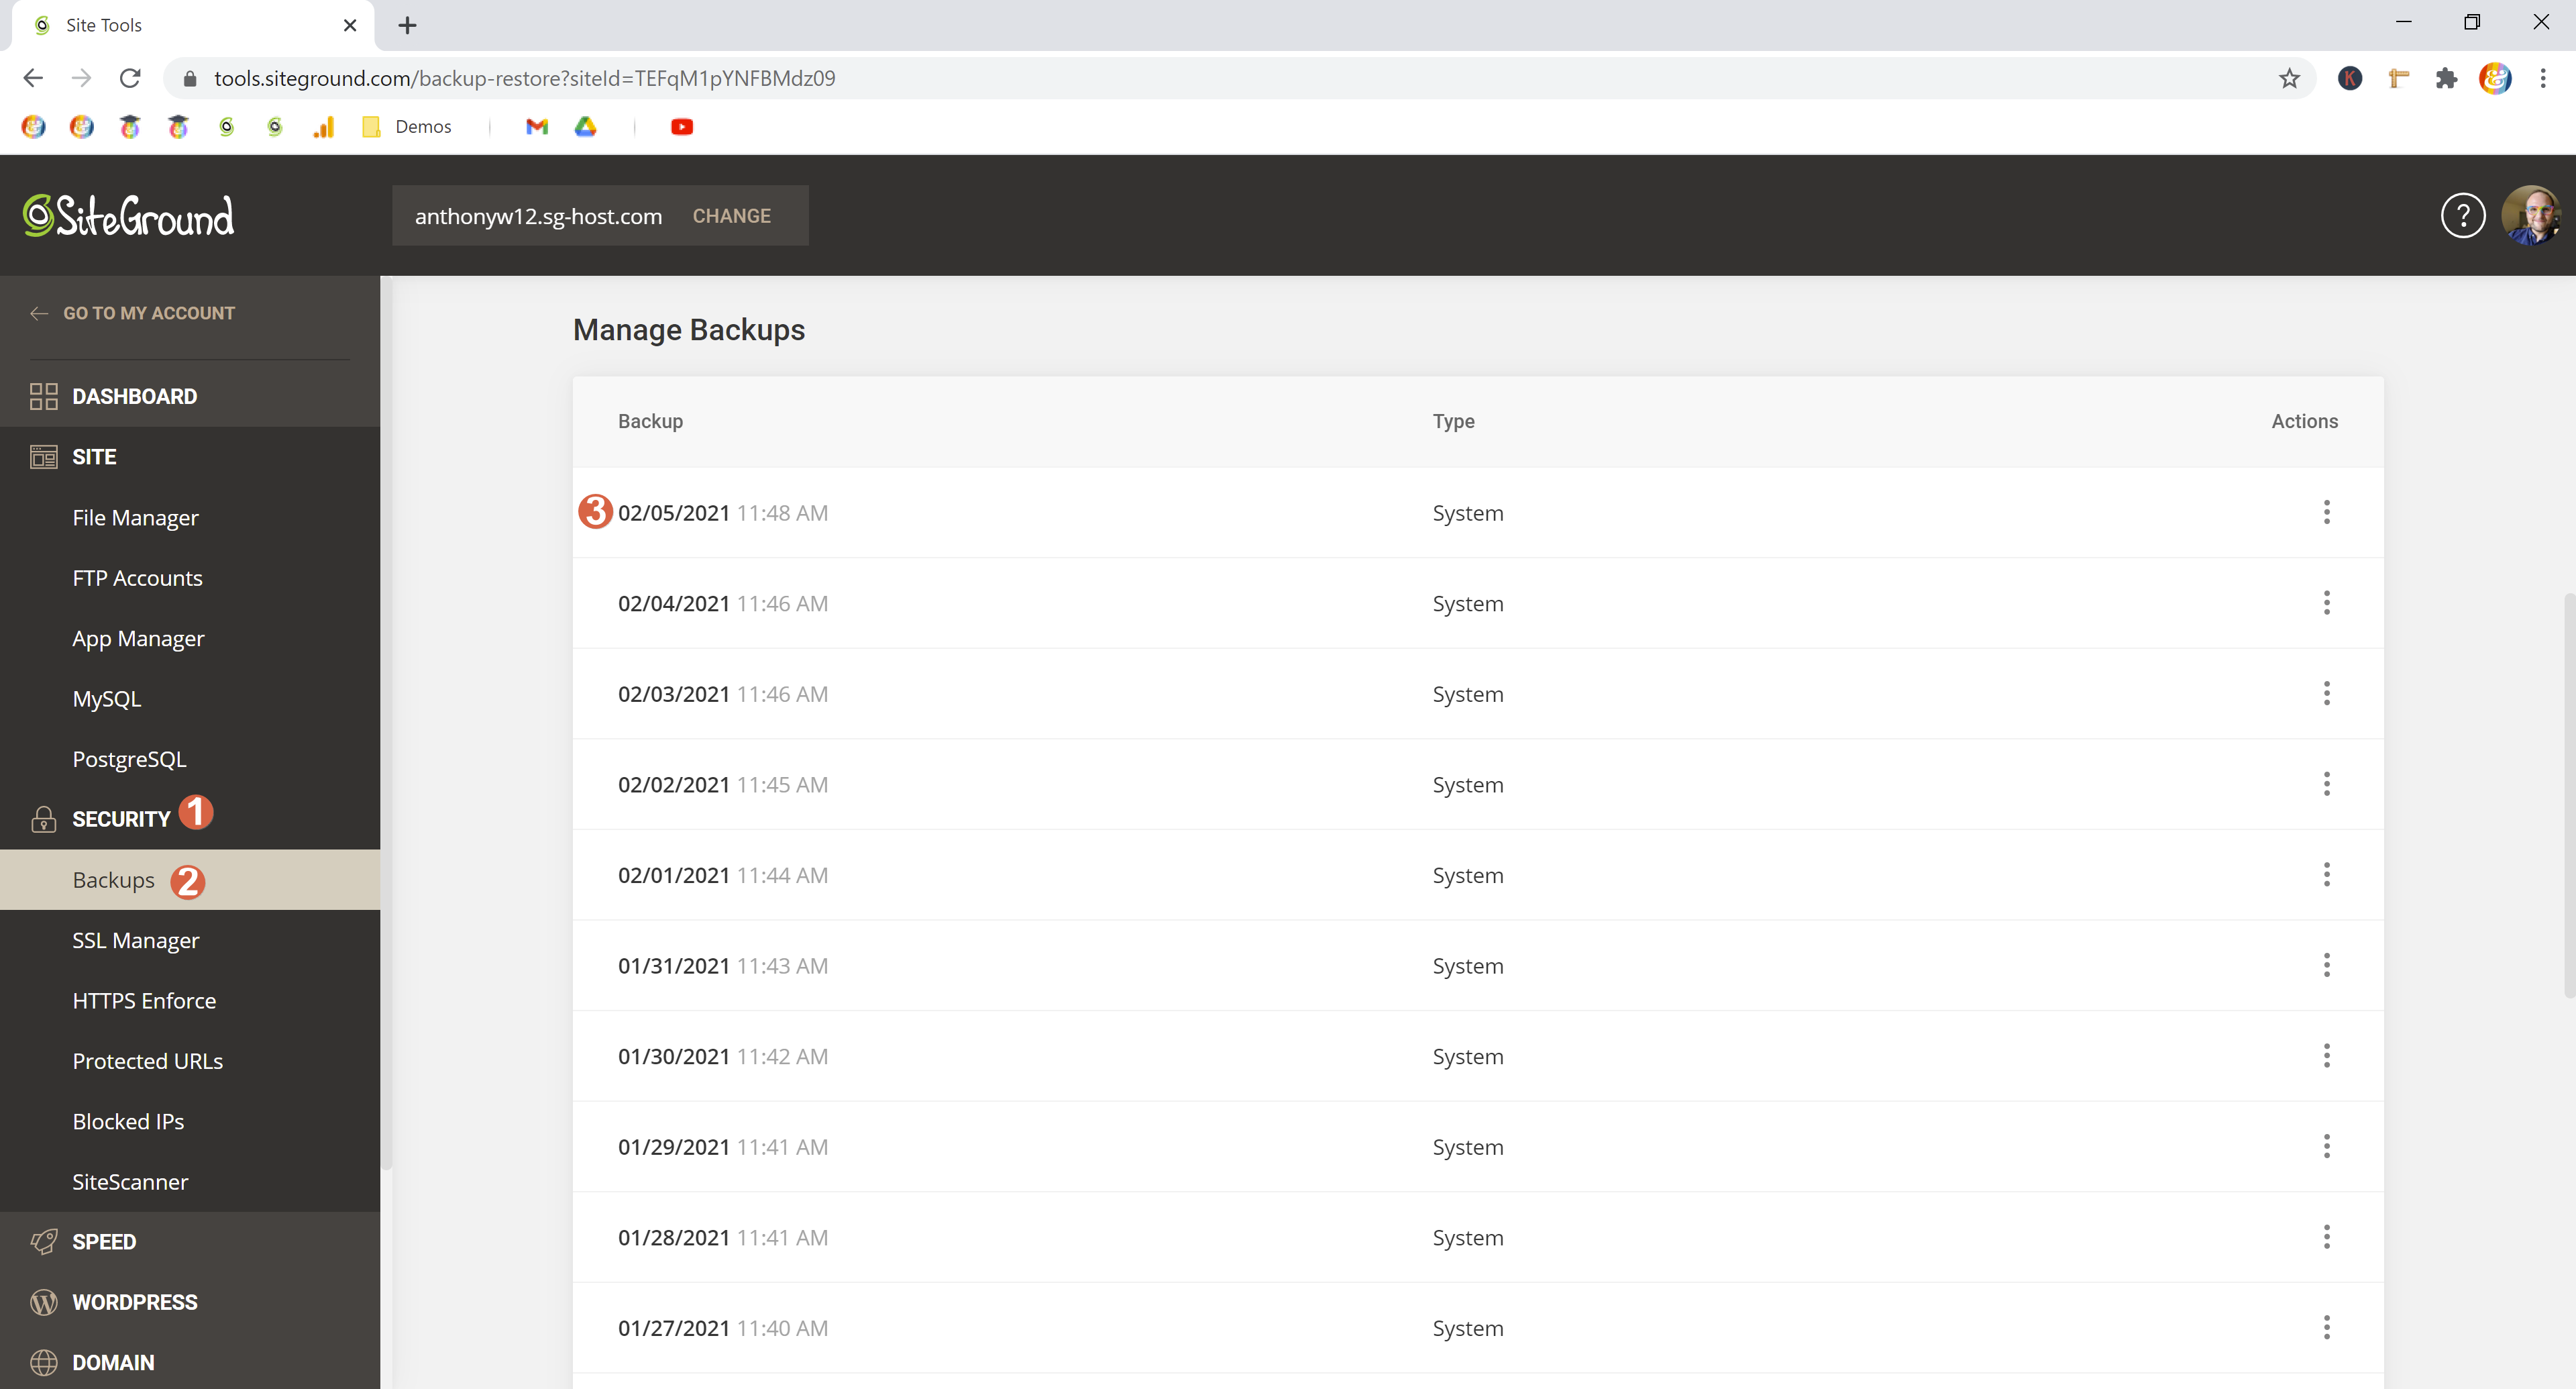
Restoring them is just as easy!
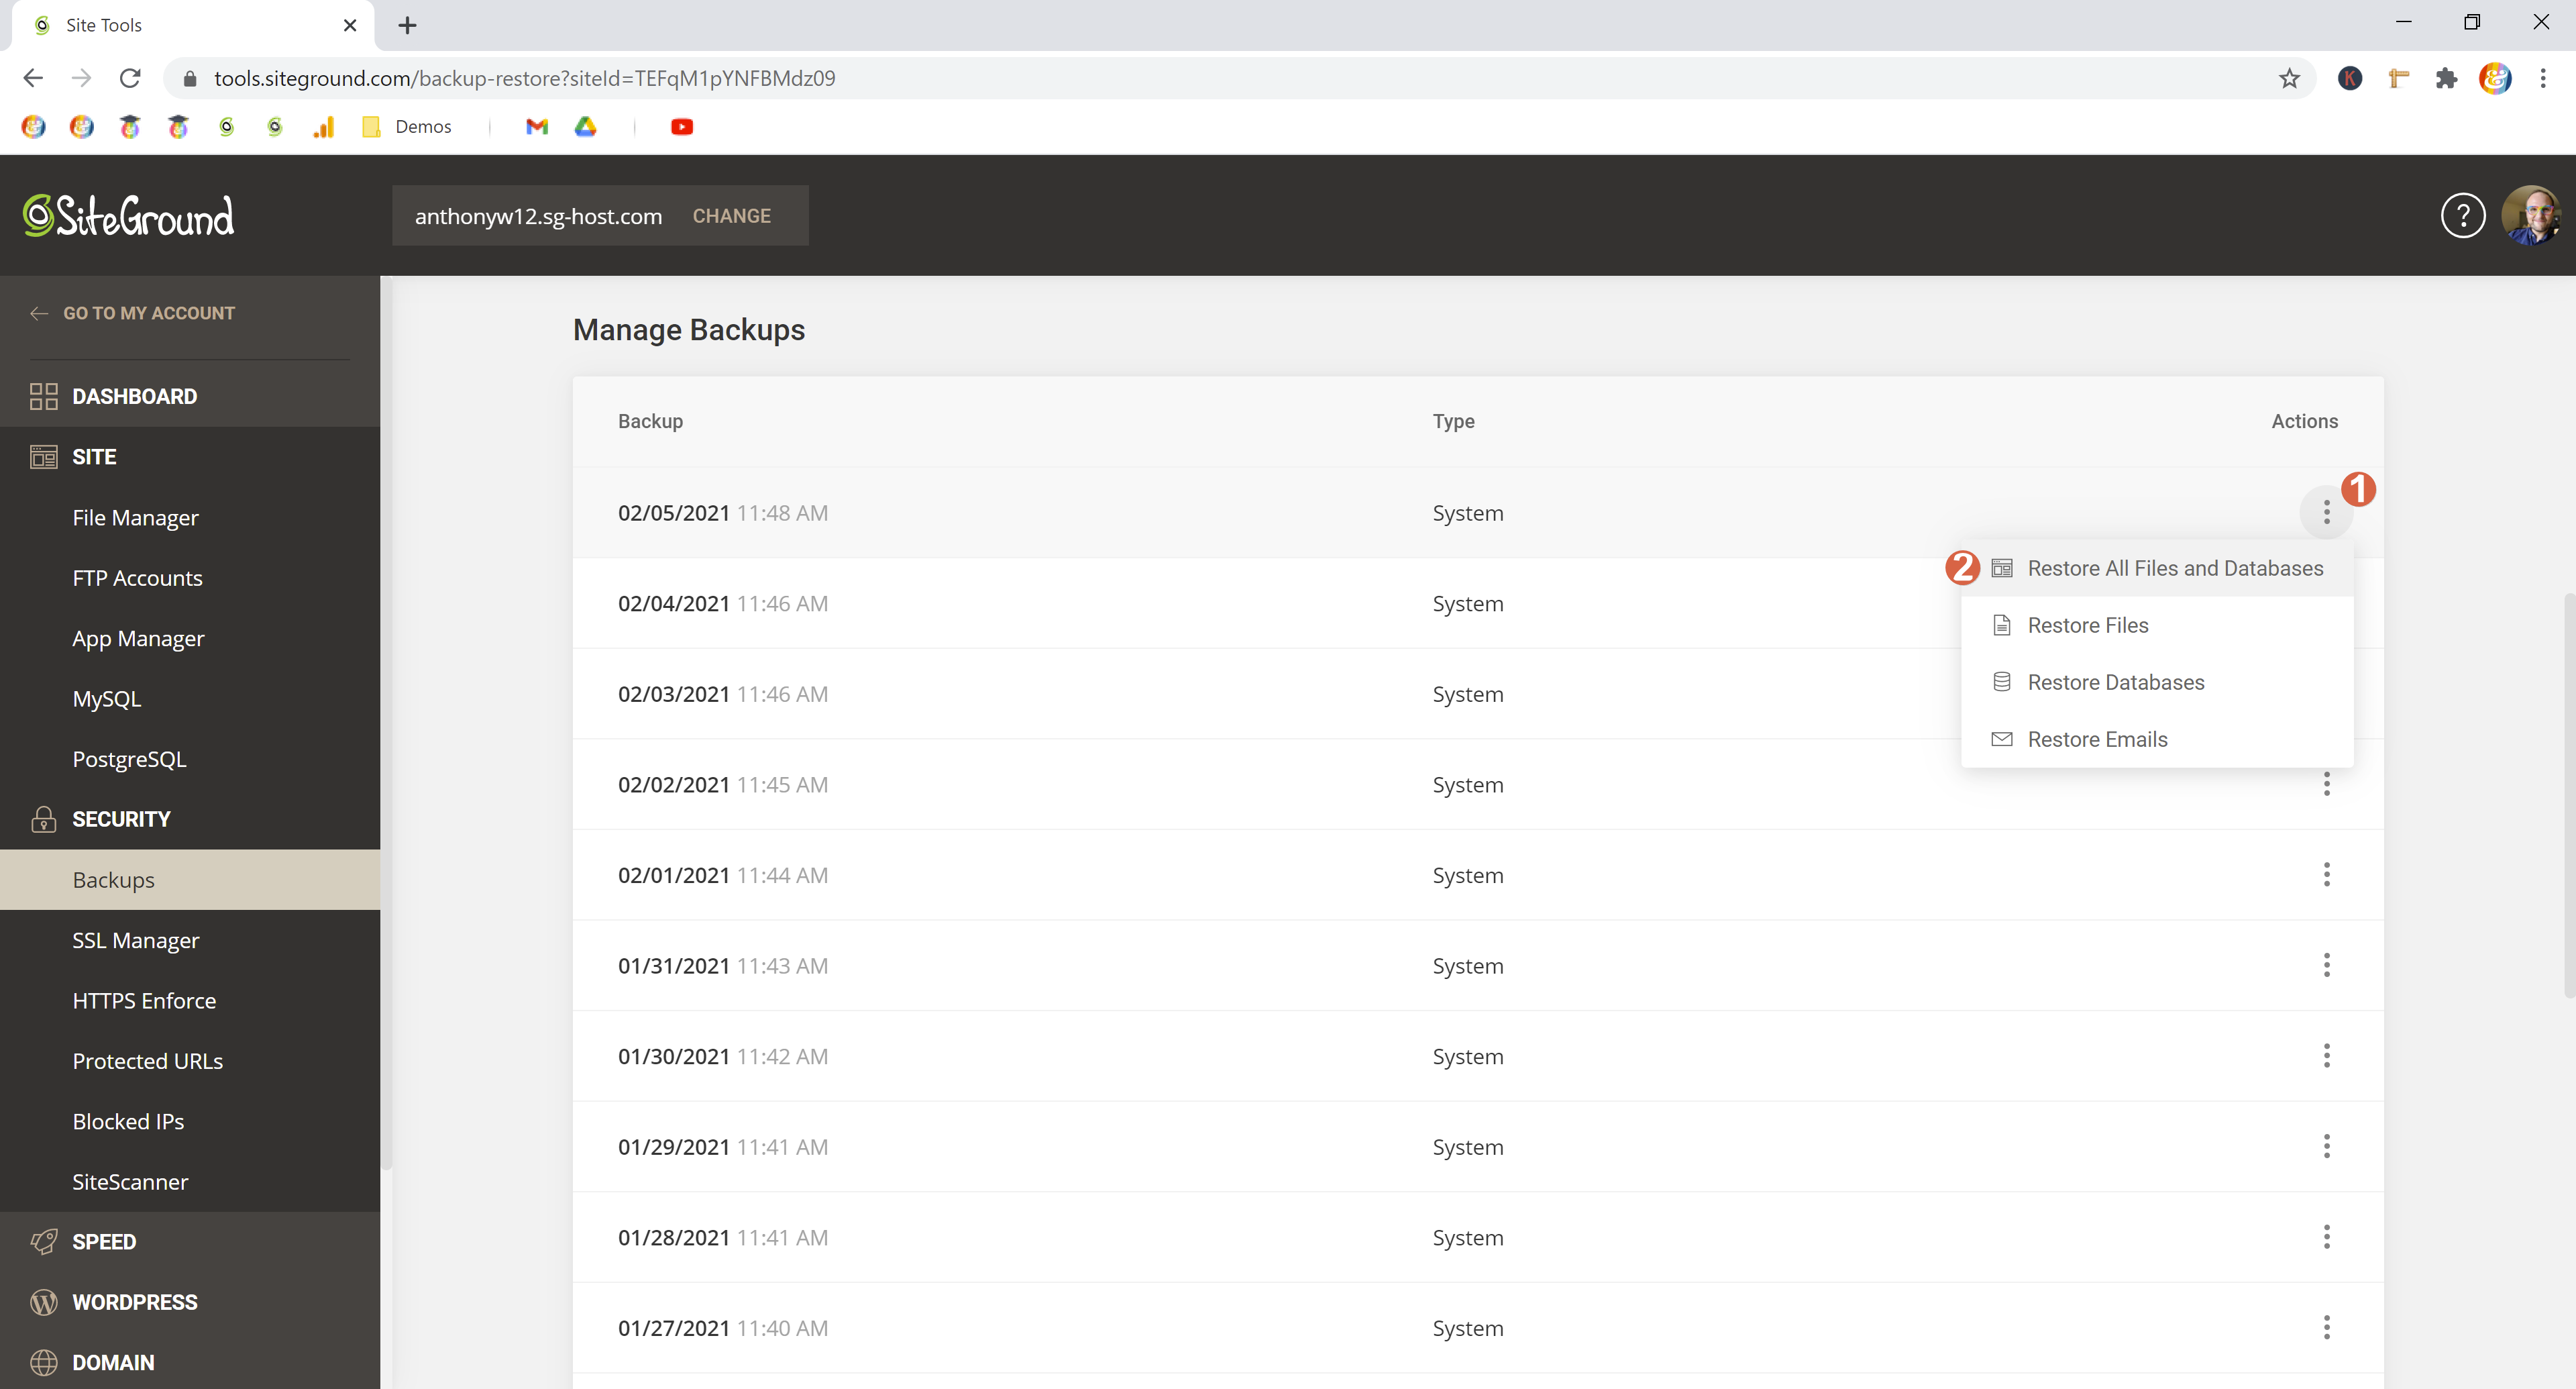
So, if you’re in the market for an amazing Host, definitely check out SiteGround. They’re easily the best Host I’ve used, and they take backups you don’t even need to think about!
How to take free, automatic WordPress backups with UpdraftPlus
Even if you’re using SiteGround, or another Host that takes automatic WordPress backups, I still recommend taking a second full backup.
This one (as I mentioned above) should be stored in a secondary location. I recommend a cloud storage tool like Google Drive or OneDrive.
Limitations of the free version of UpdraftPlus
First, on the free version of UpdraftPlus, you can’t specify a time for your backups. If you’ve got a high-traffic site, this might not be ideal.
Second, you’re limited in how you’re able to organize backups on remote storage. You’re stuck with a default root folder that you won’t be able to change. This isn’t a huge deal for most folks, but good to be aware of it.
And also, you’re only able to schedule a single backup job at a single interval. Again, this won’t matter much for most, but if you have specific needs, it might matter for you.
Ultimately, my preferred paid plugin is Duplicator Pro. I only selected UpdraftPlus for this article because this plugin allows you to schedule backups in the free version.
But, if you’re interested in upgrading to the paid version of UpdraftPlus, I’d definitely still recommend it! It’s an excellent backup tool too, and well worth the money.
Setting up UpdraftPlus for automatic WordPress backups
Let’s walk through how to get these automatic WordPress backups set up on your site:
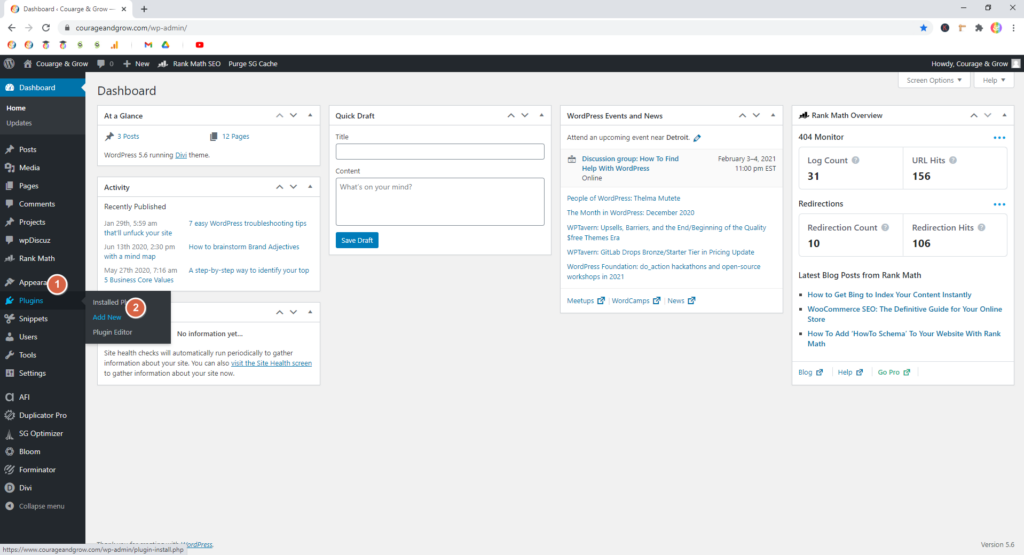
Step 1. Go to the Plugin Repository
In your WordPress Dashboard, on the left side, go to Plugins > Add New
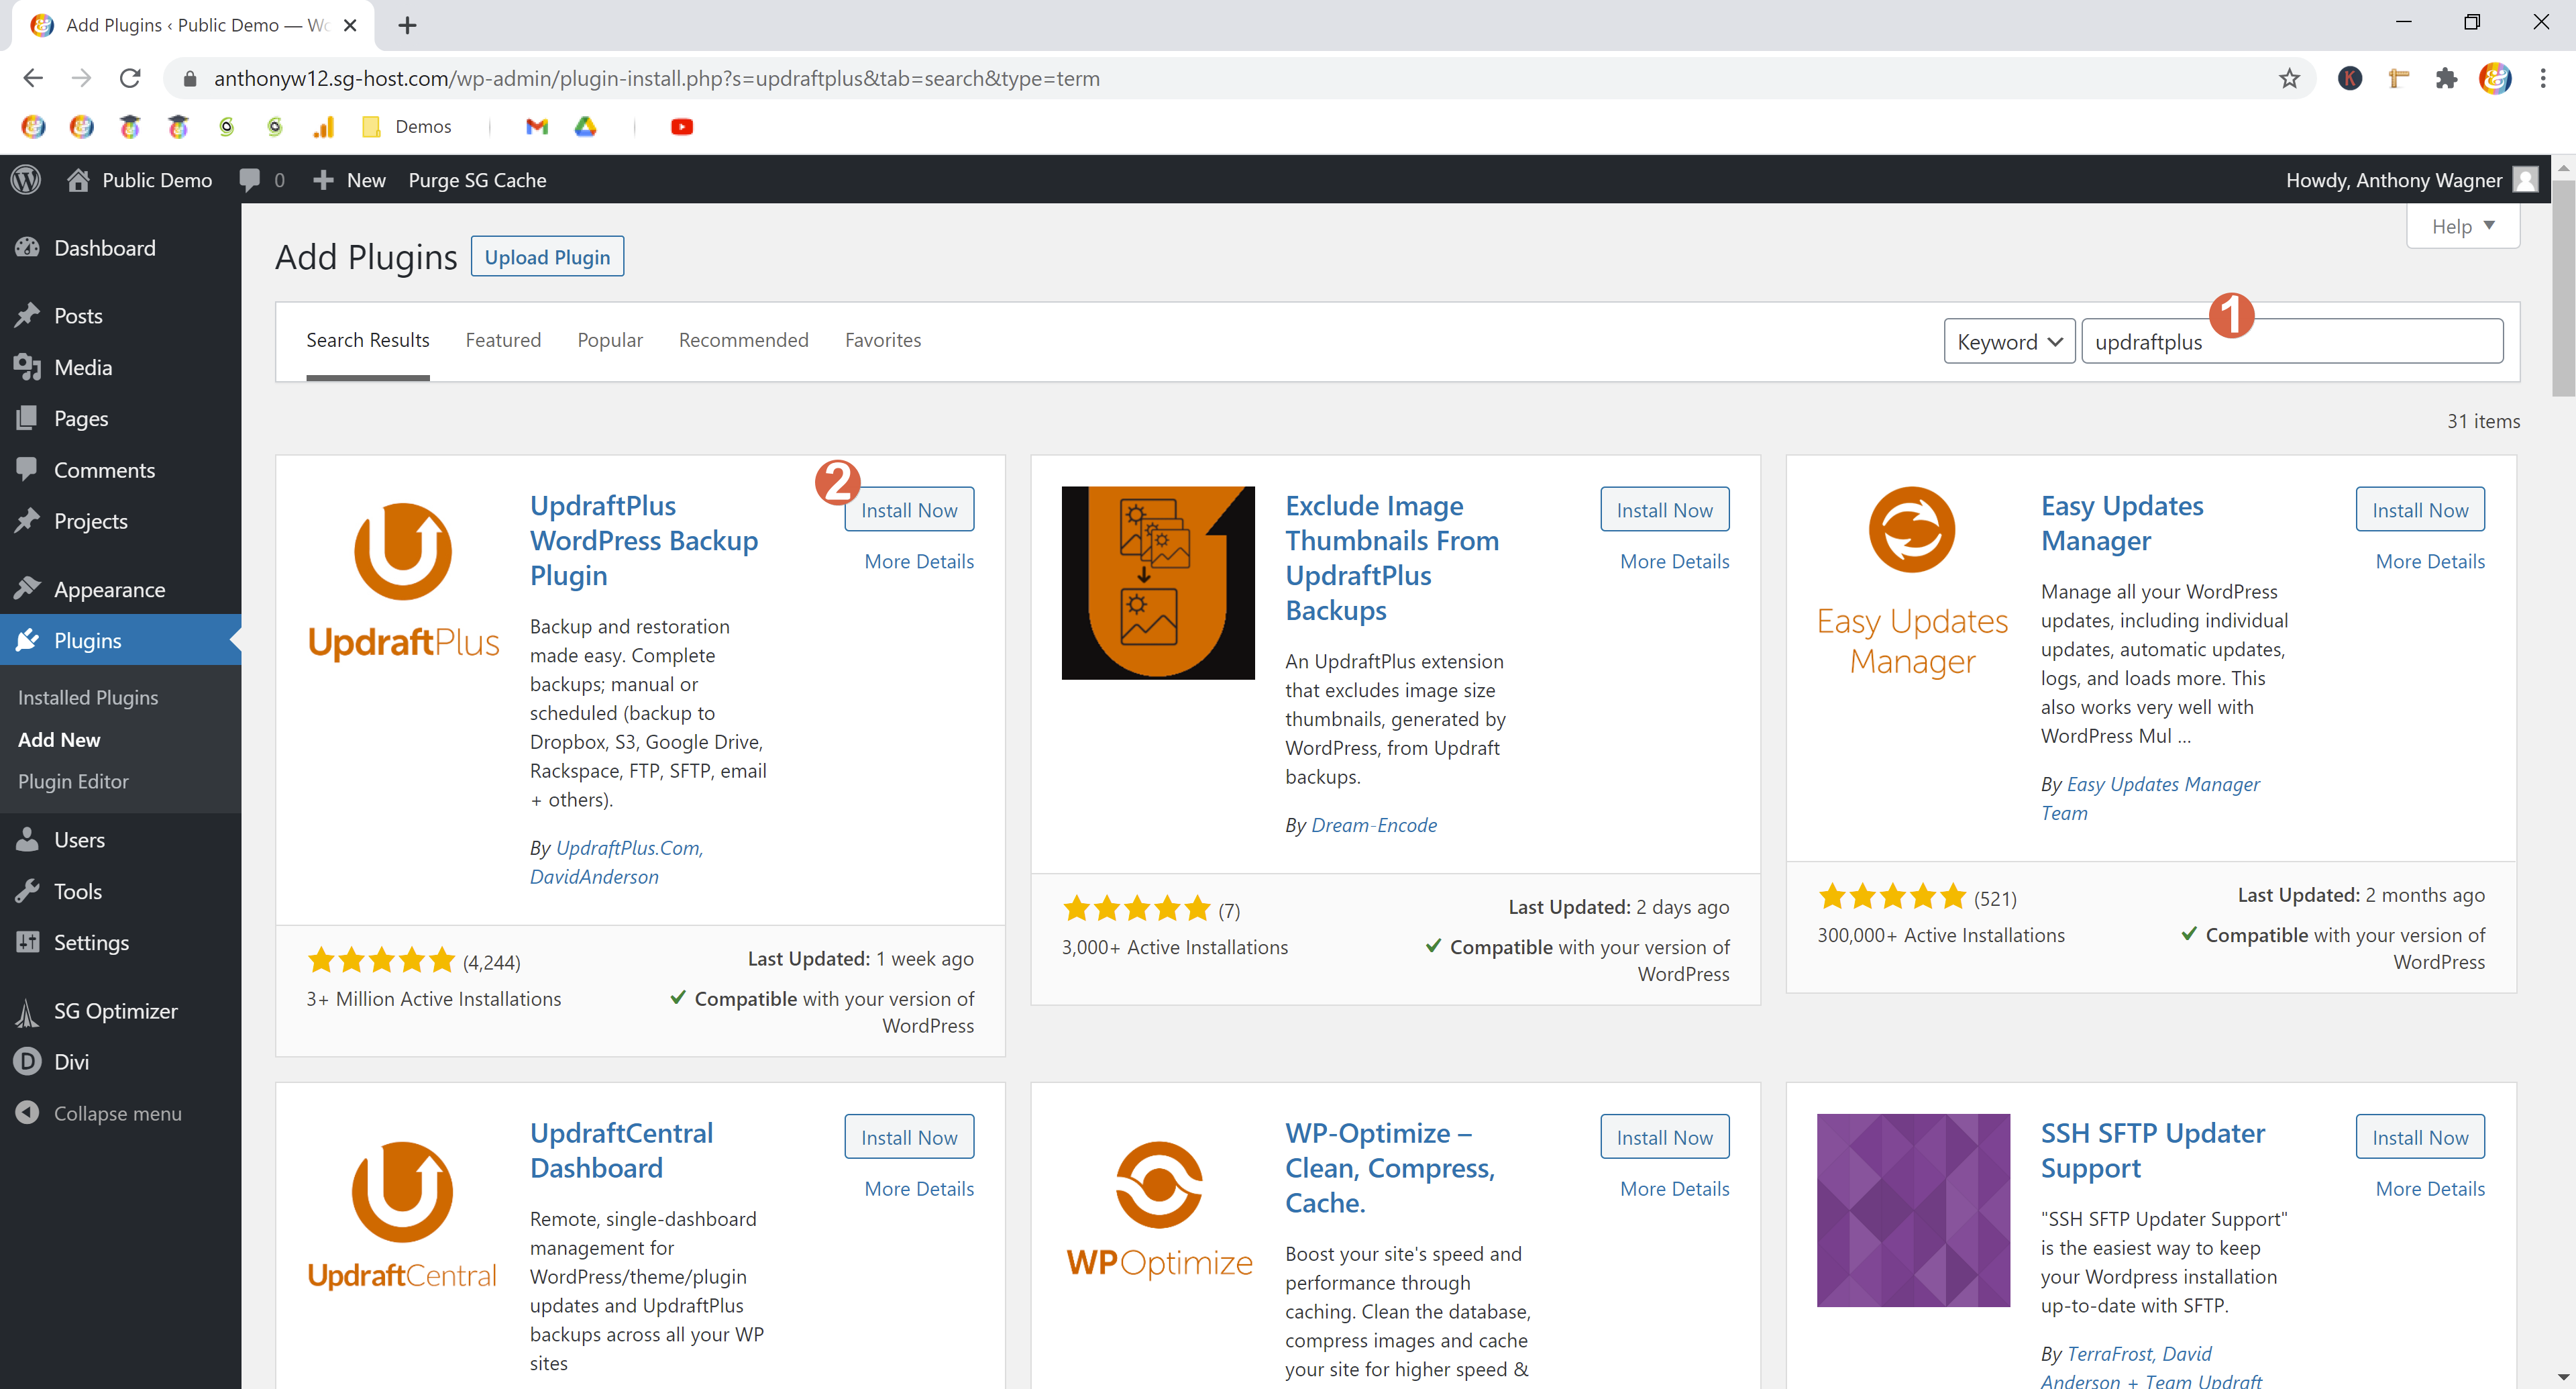
Step 2. Install and activate UpdraftPlus
In the search box, type Updraft Plus. Then, click Install Now on the UpdraftPlus plugin that pops up (should be By UpdraftPlus.Com, DavidAnderson)
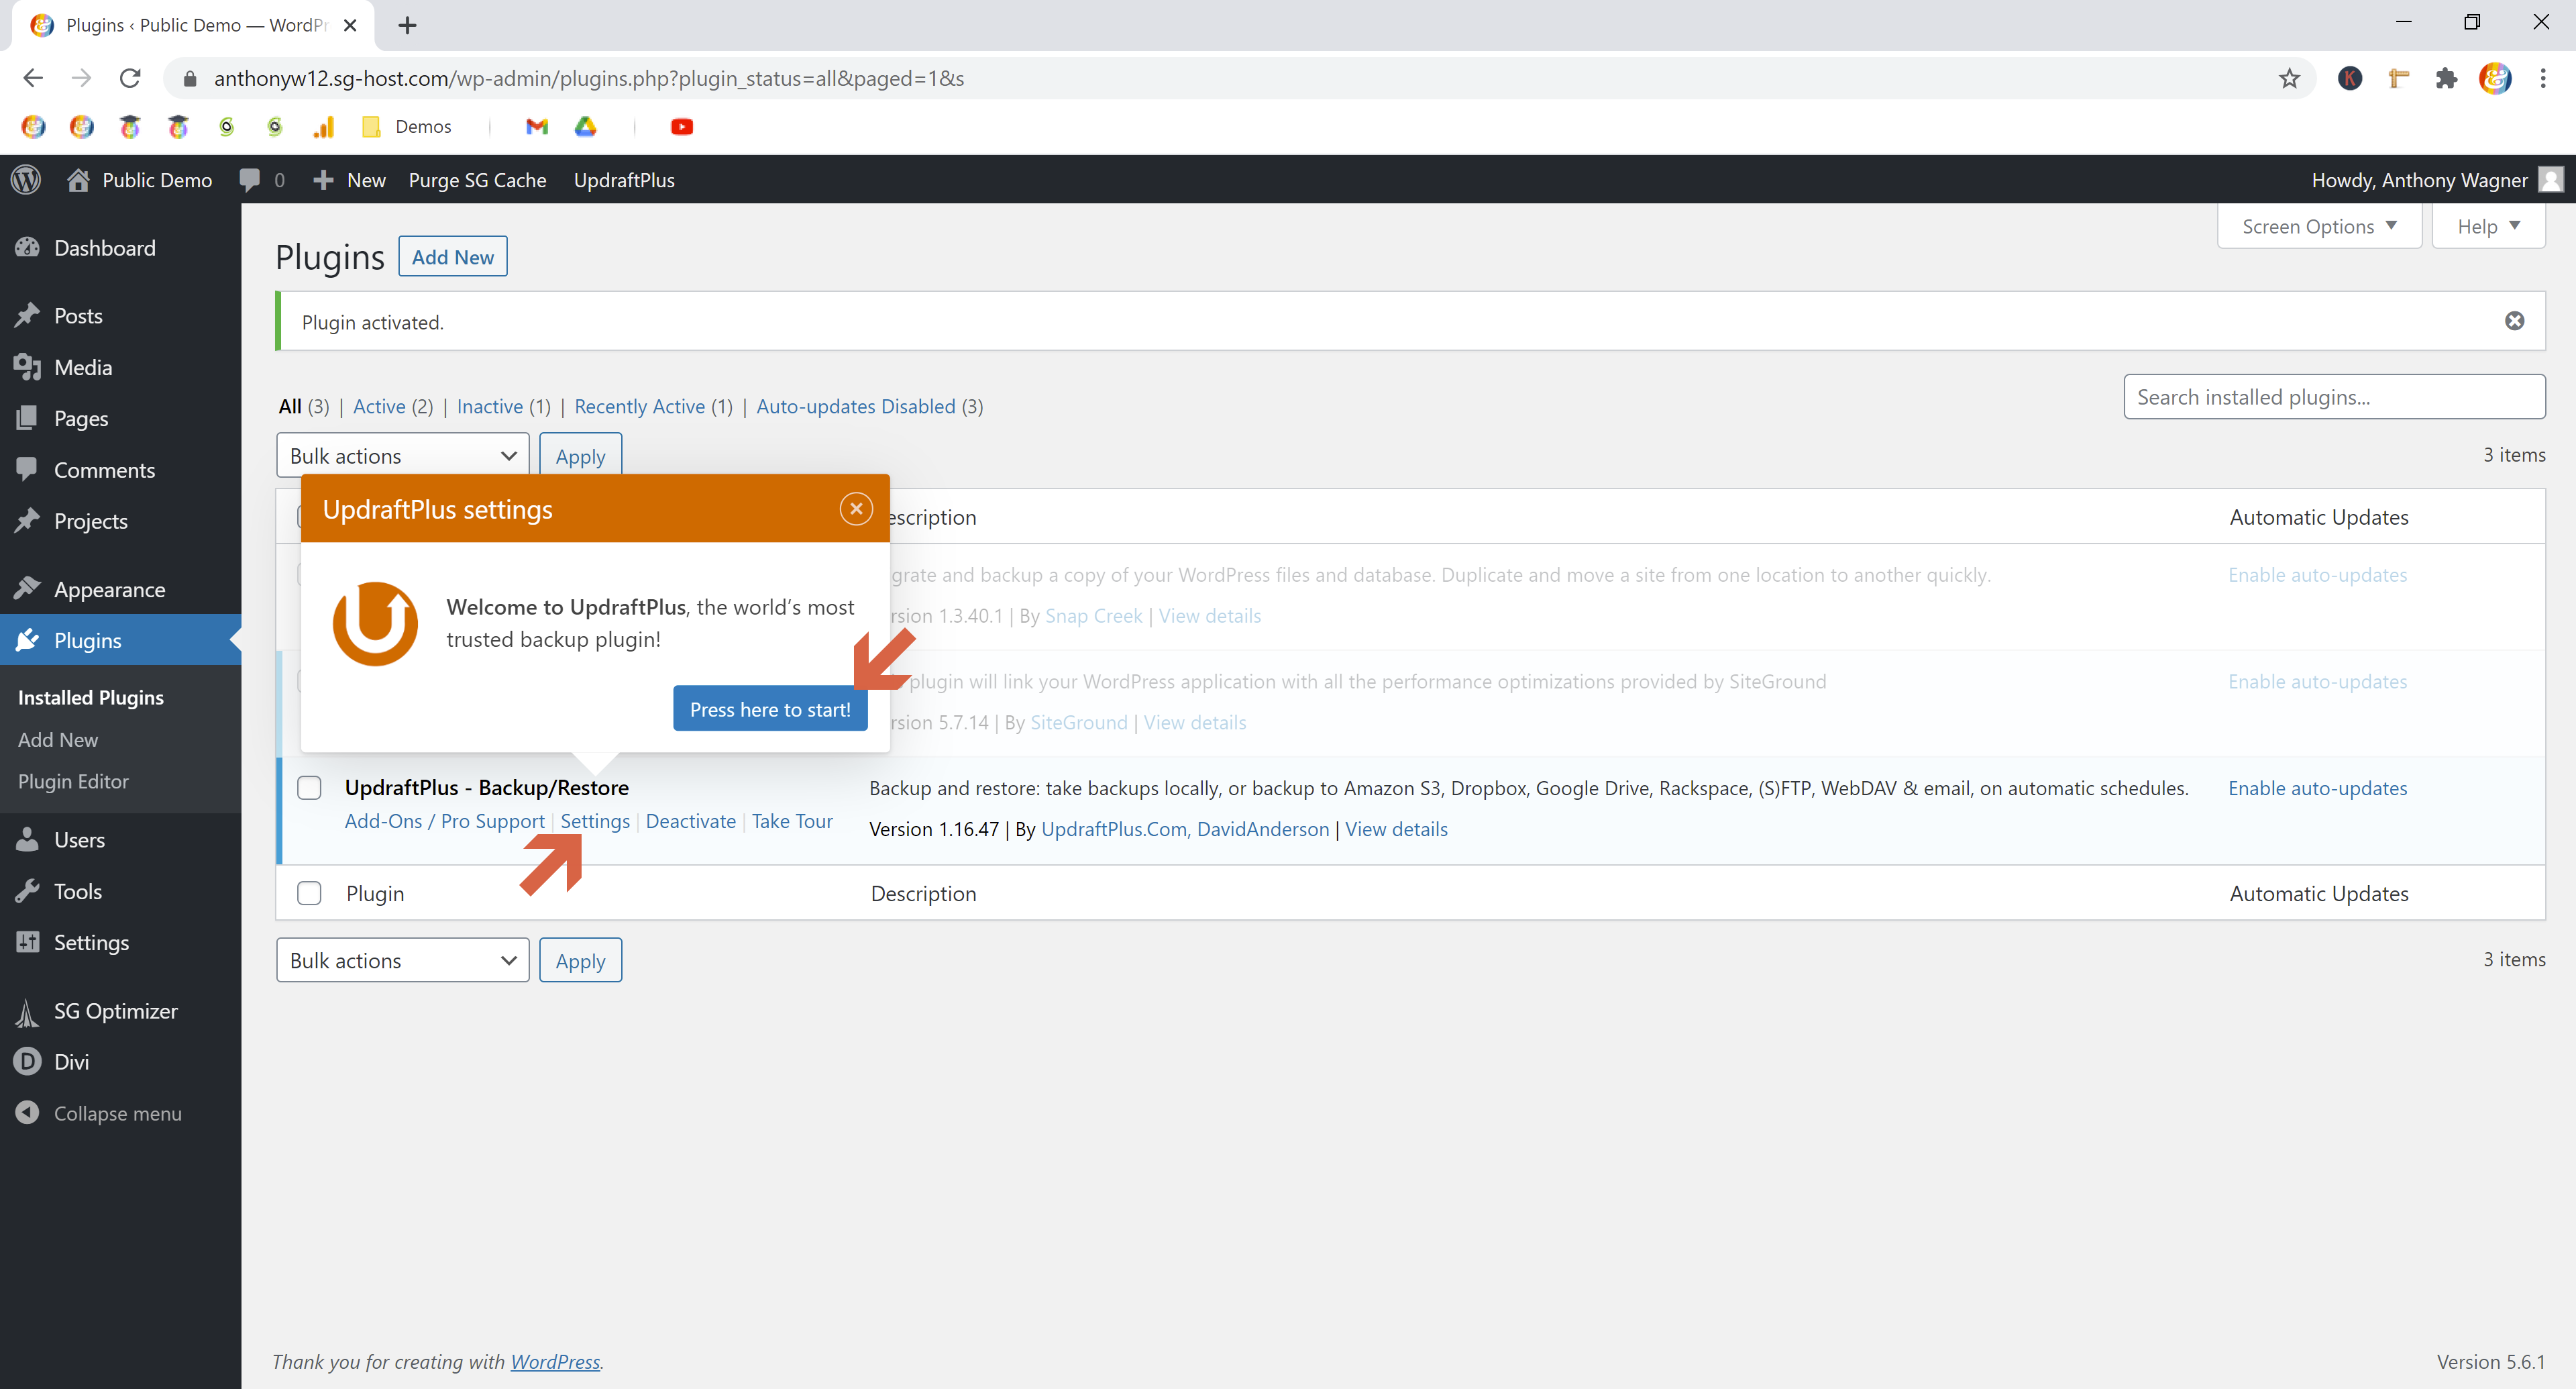
Once installed, click Activate
After activation, the plugin should take you automatically back to the Plugin Repository. Once there, you may be prompted with a Press here to start! button — click that.
Alternatively, you can click the Settings link underneath the plugin.
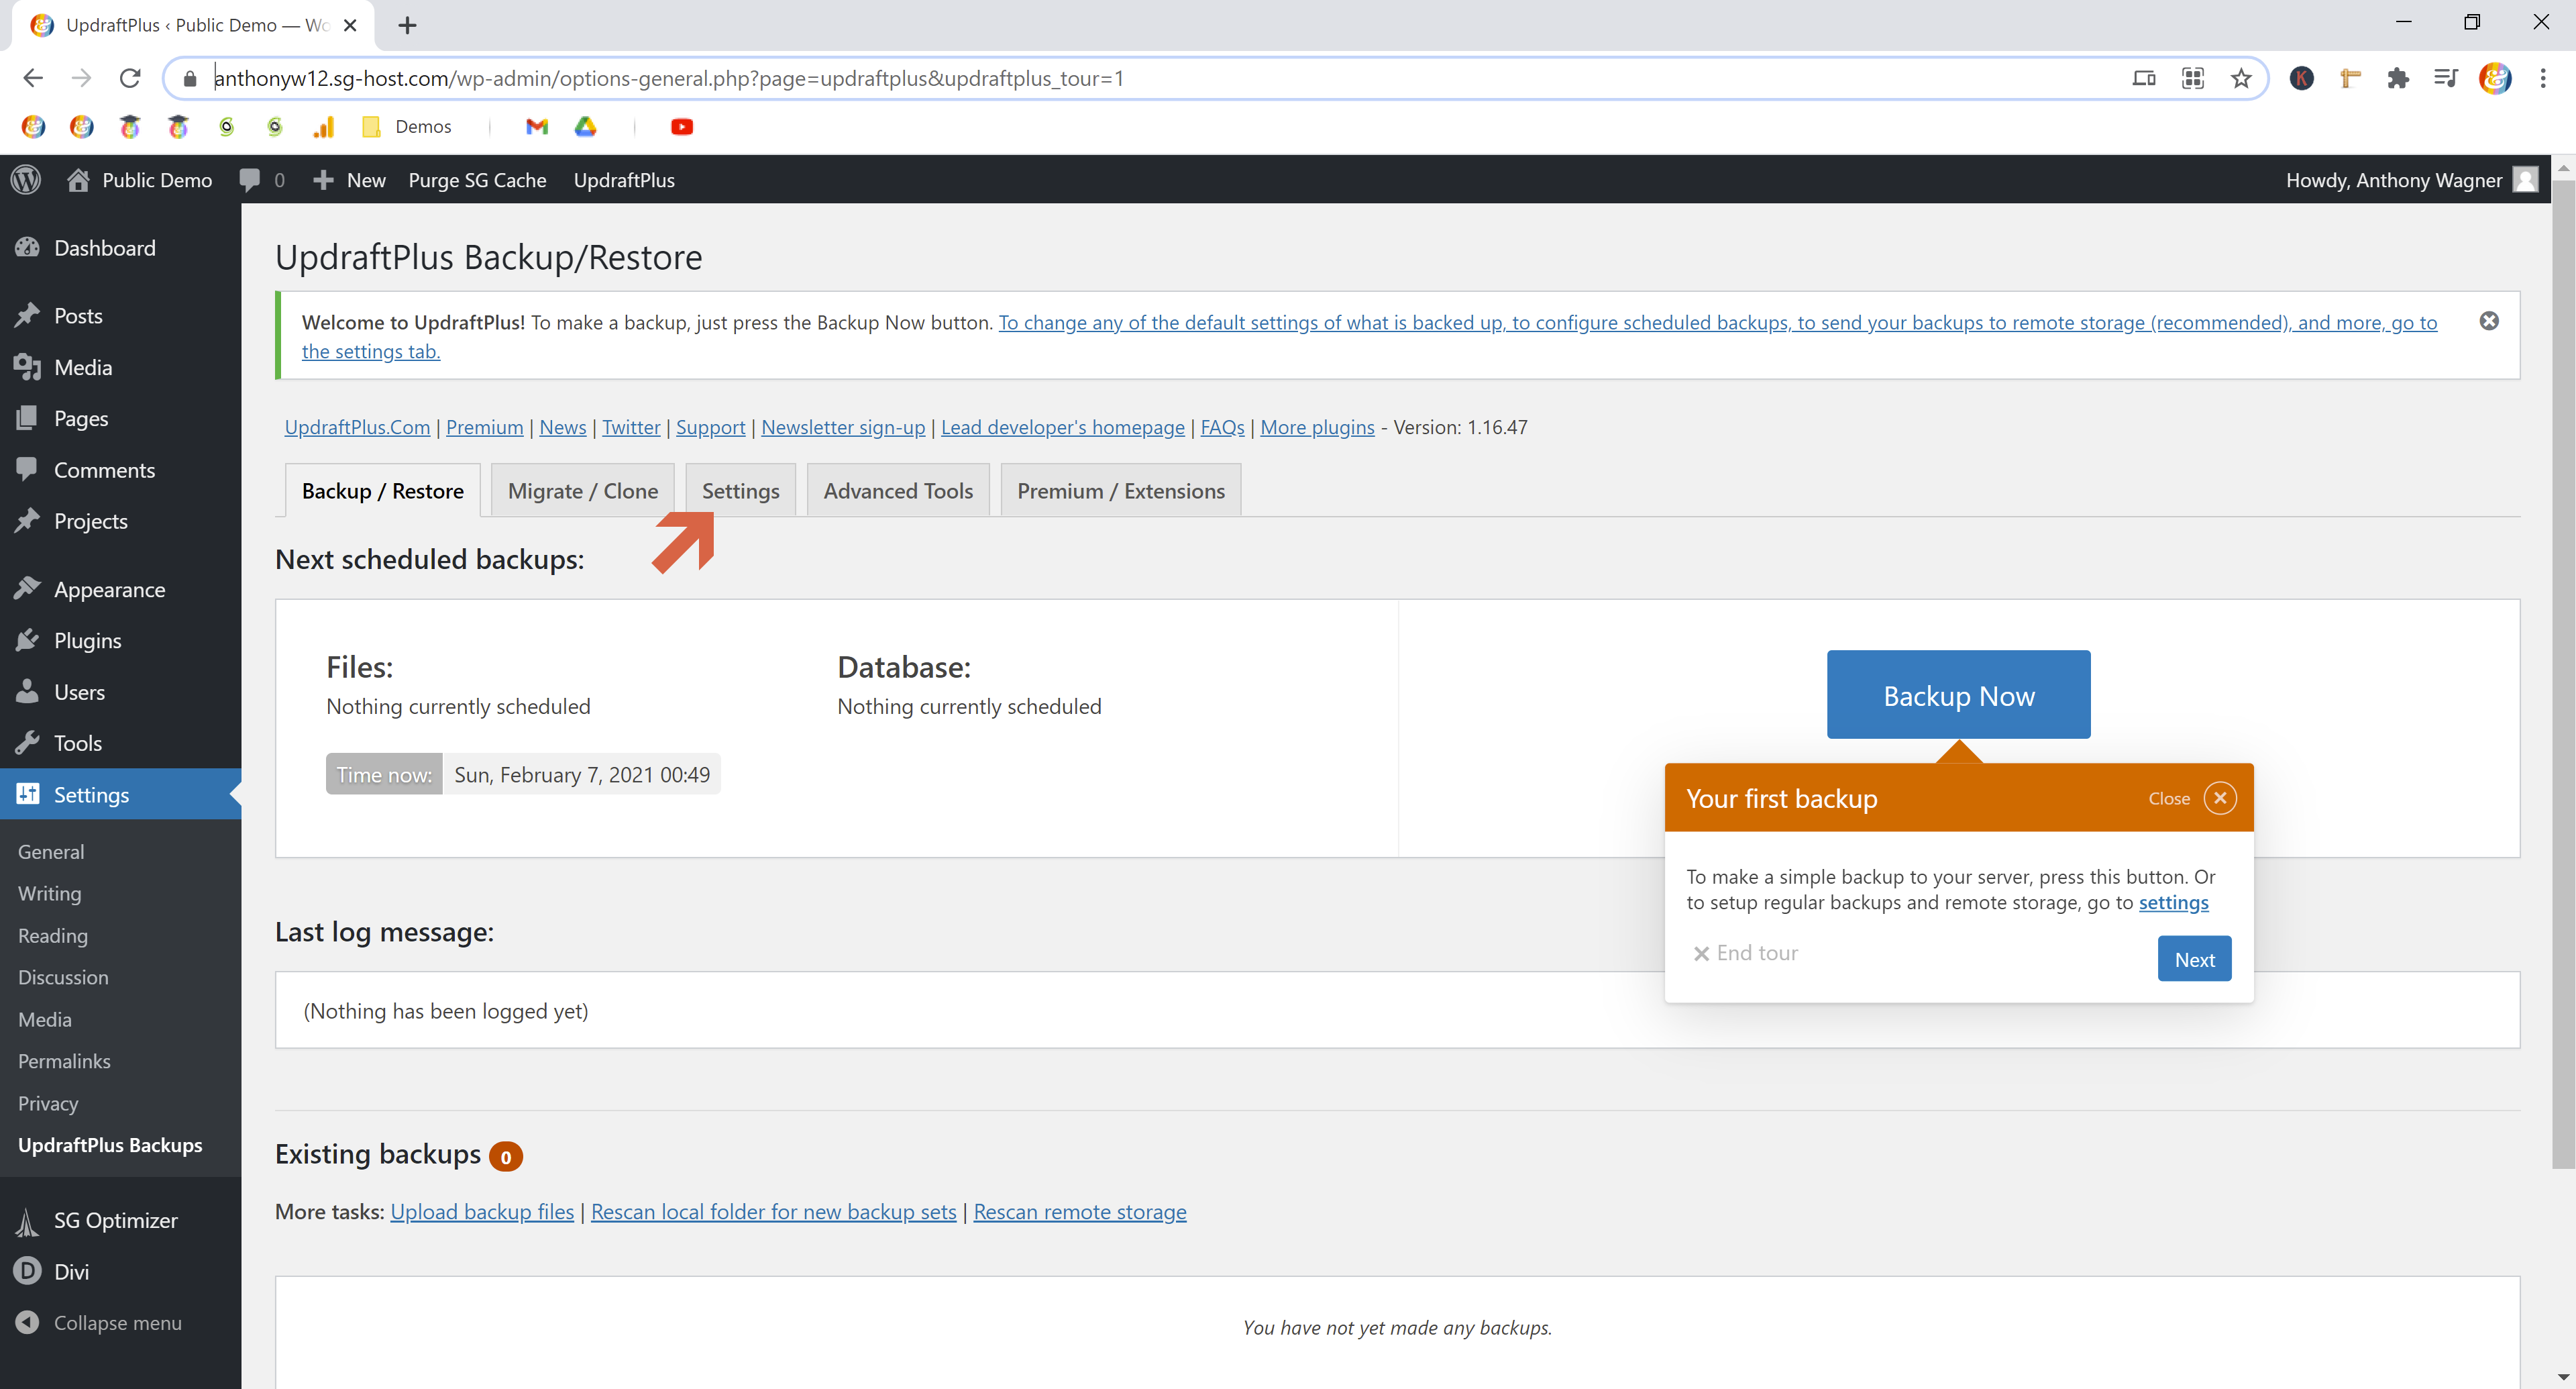
Step 3. Schedule automatic WordPress backups
Because we want to schedule automatic WordPress backups, and not just take a one-off backup, you can ignore the Your first backup prompt.
Click Settings instead.
From here, set the Files backup schedule to Daily, and change the number to retain to 5 (ideally — you can adjust this number if you deem appropriate, but I think 5 is good.)
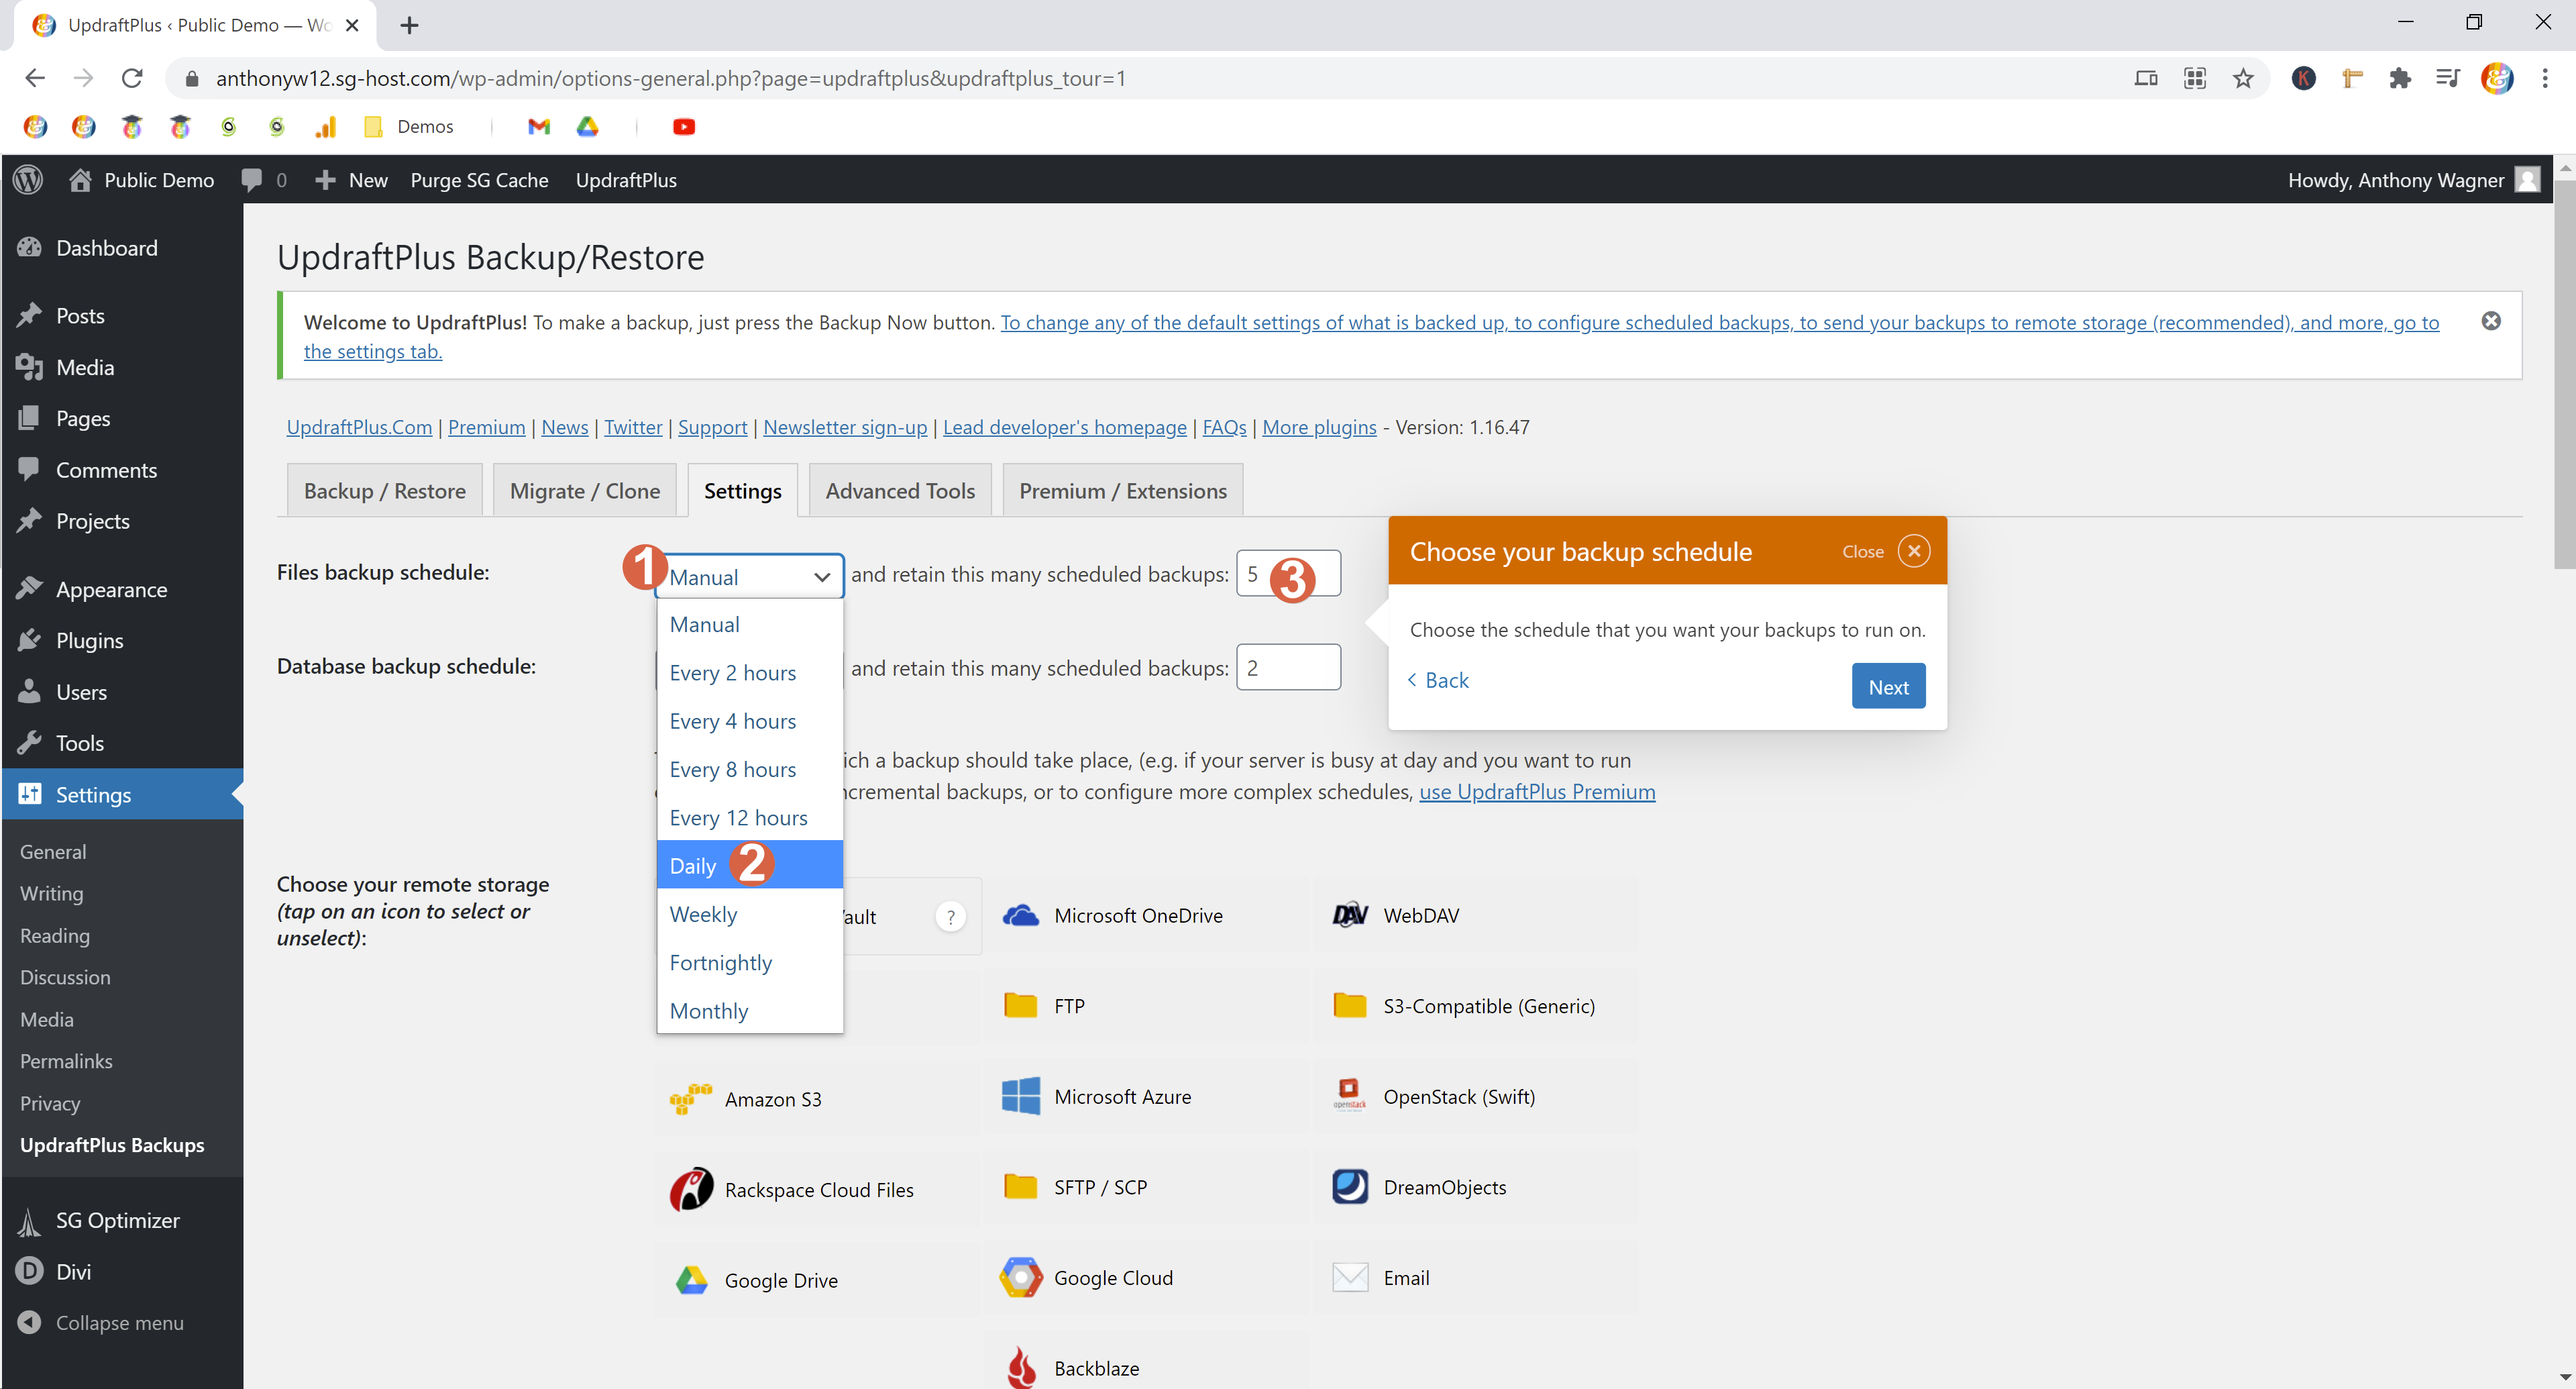
Repeat these same steps for the Database backup schedule fields (Daily, 5)
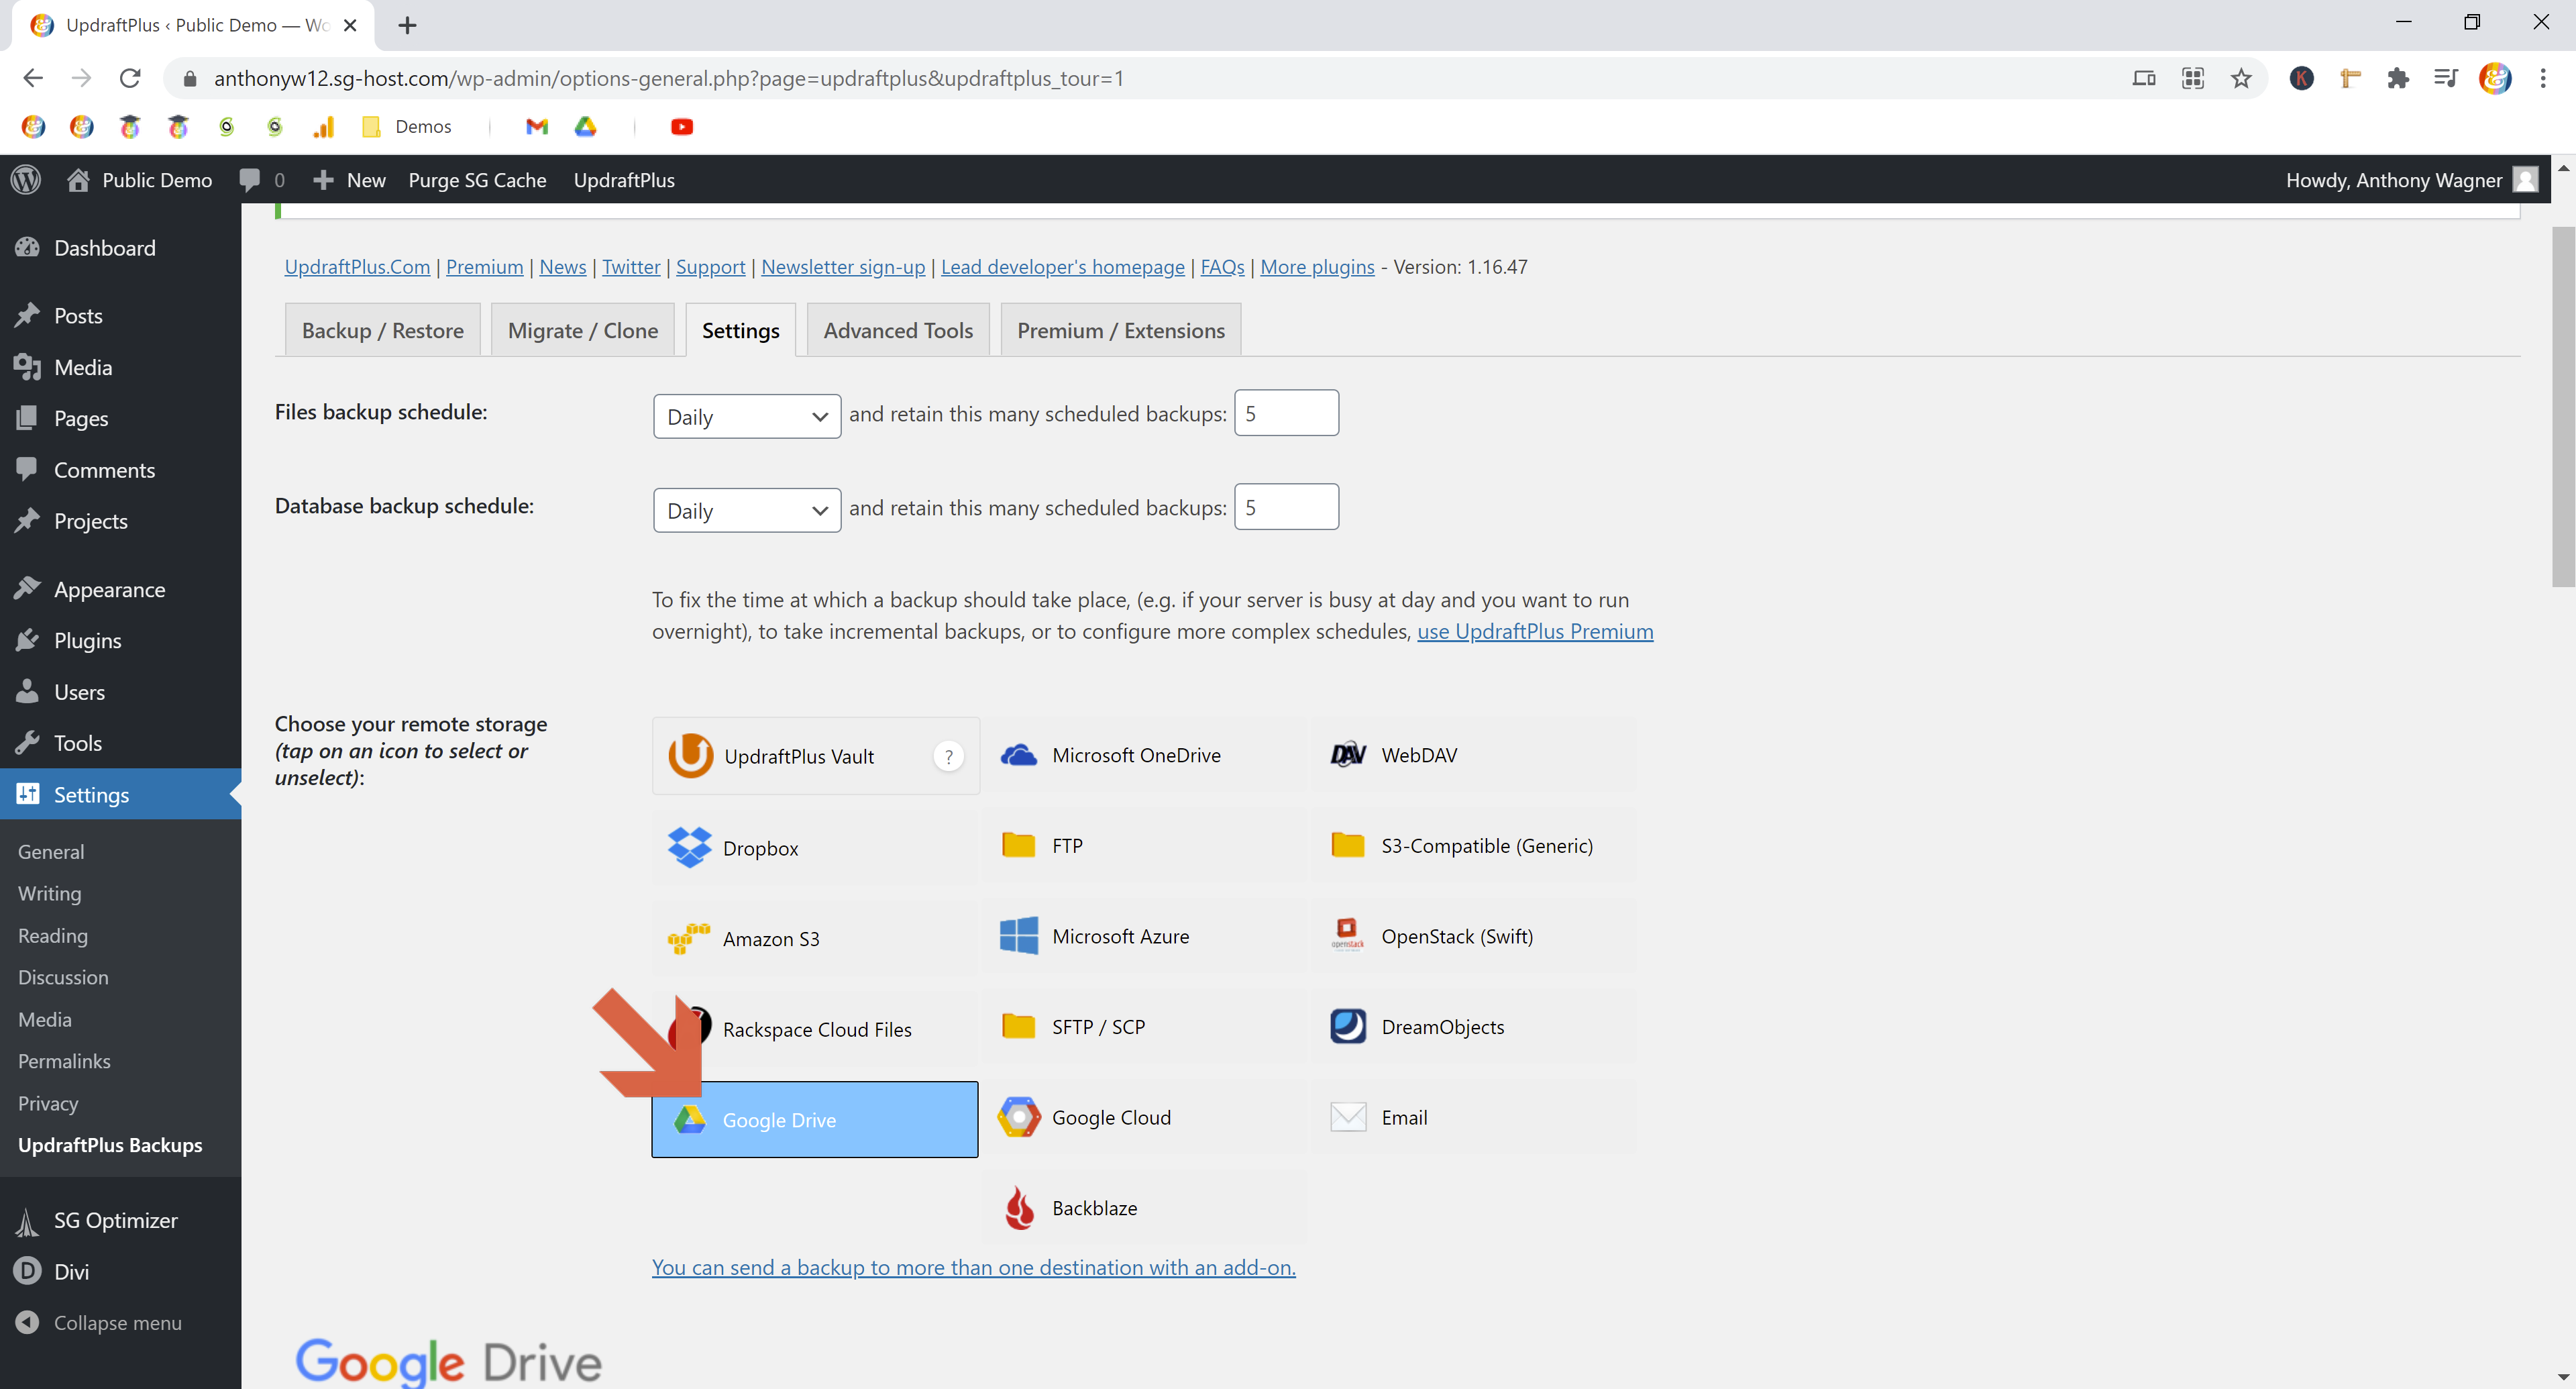
Step 4. Select cloud storage — I recommend Google Drive
Now’s where you’ll choose where you want your backups to be stored.
Setting UpdraftPlus up to transfer to any of these tools should be relatively easy. But, the easiest is definitely Google Drive. And, in most applications, it should be free!
So, select Google Drive from the list.
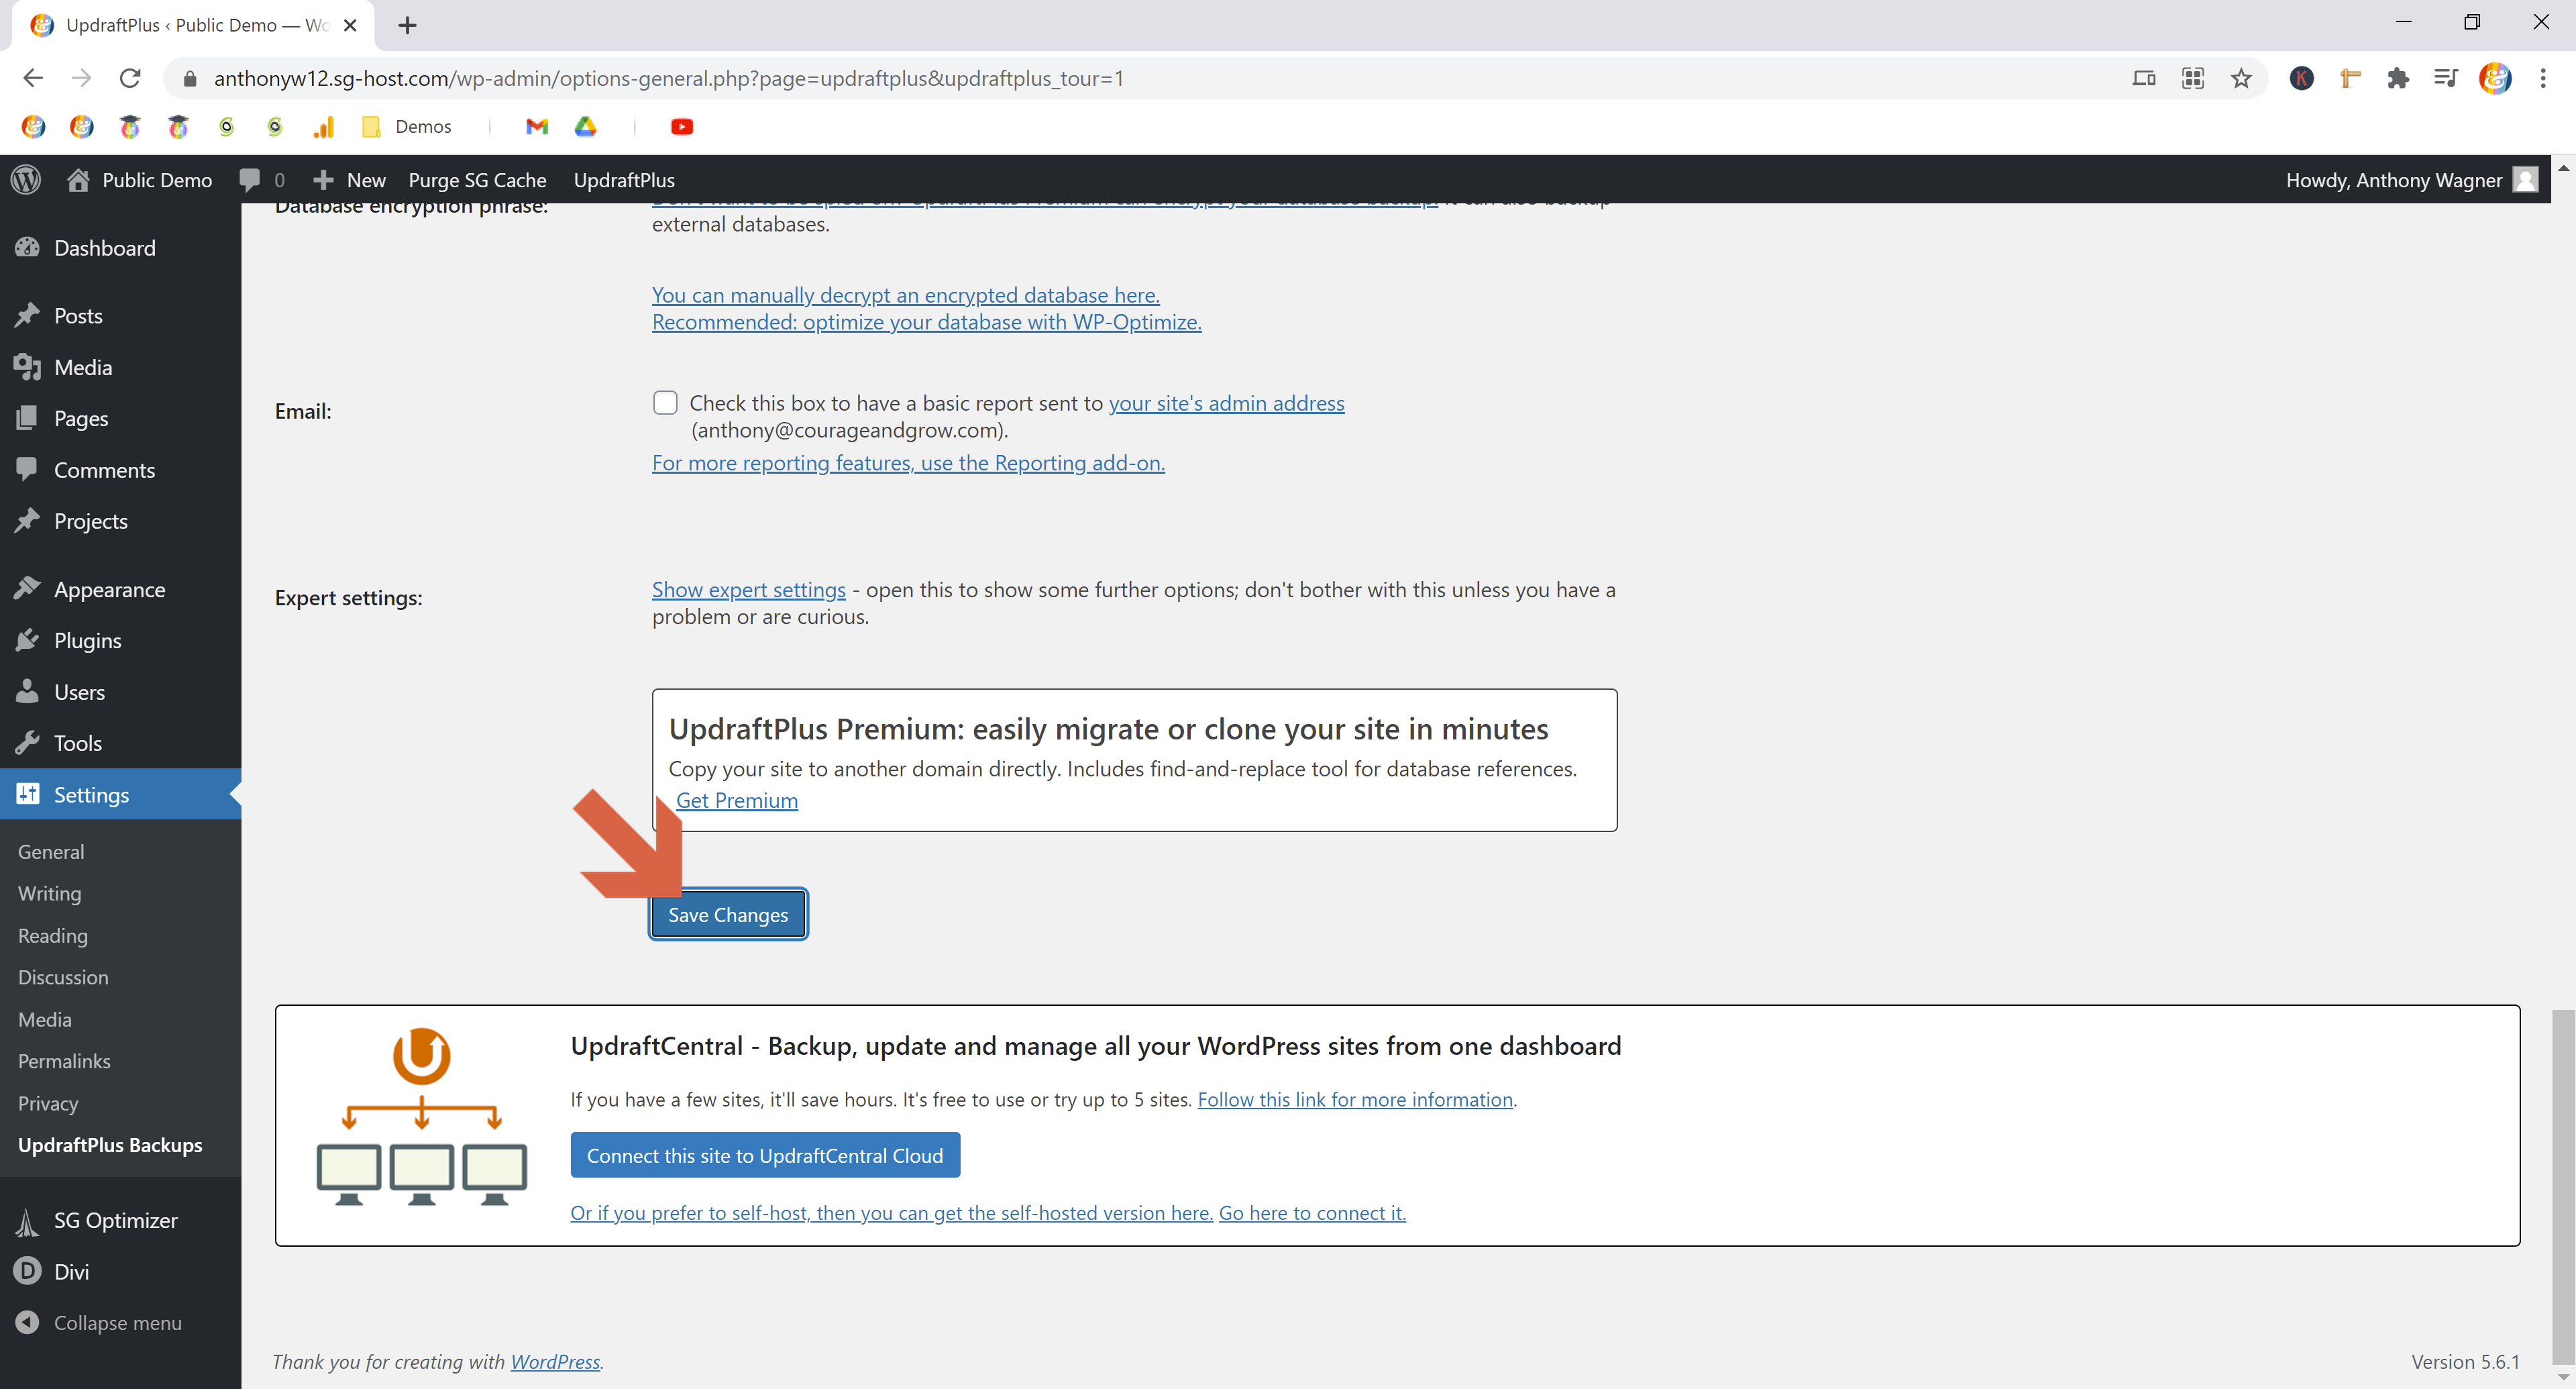
Next, without making any more edits, scroll all the way to the bottom and click Save Changes.
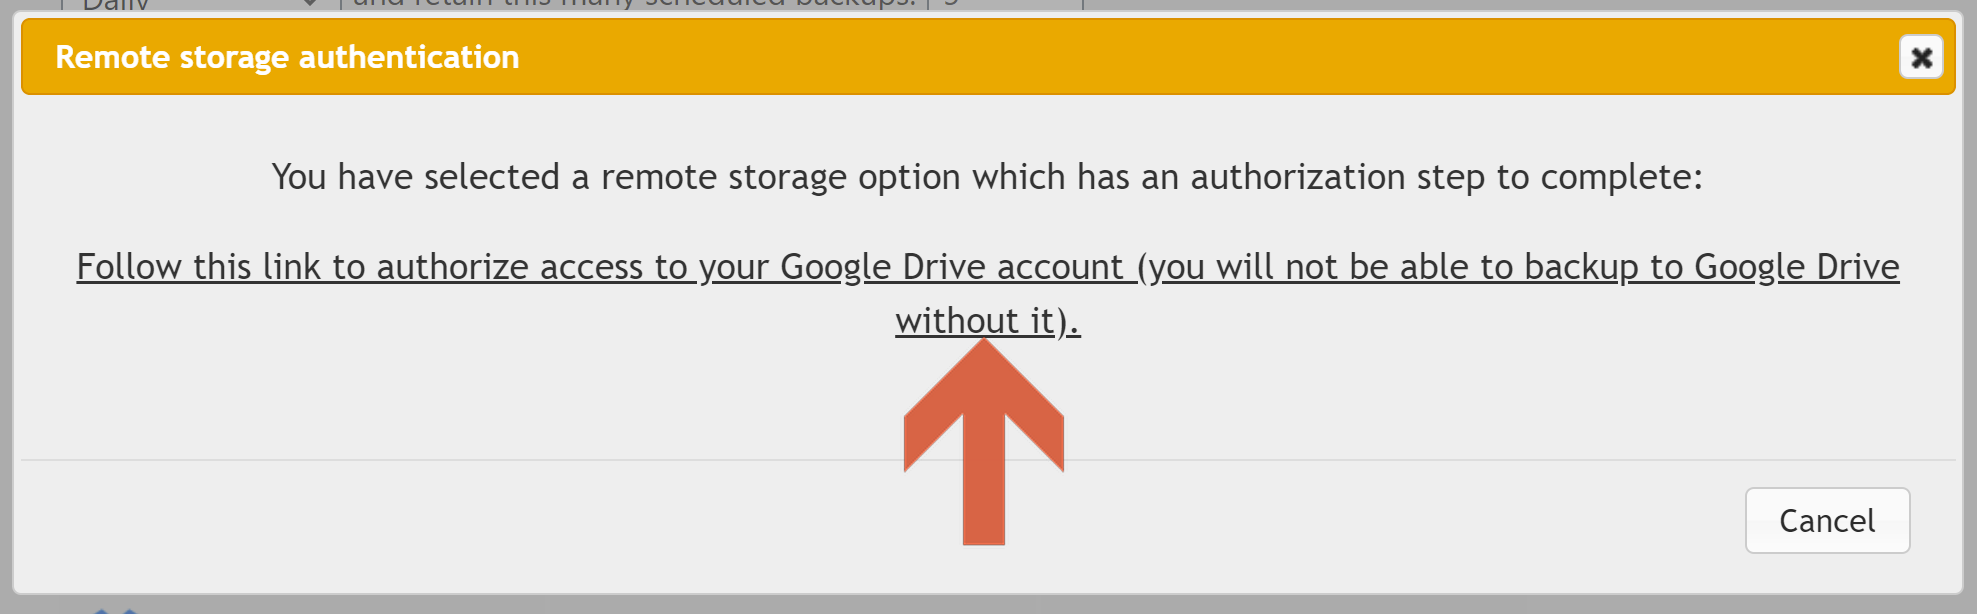
You’ll then be shown a prompt asking you to authenticate your Google account. Click anywhere on the link.
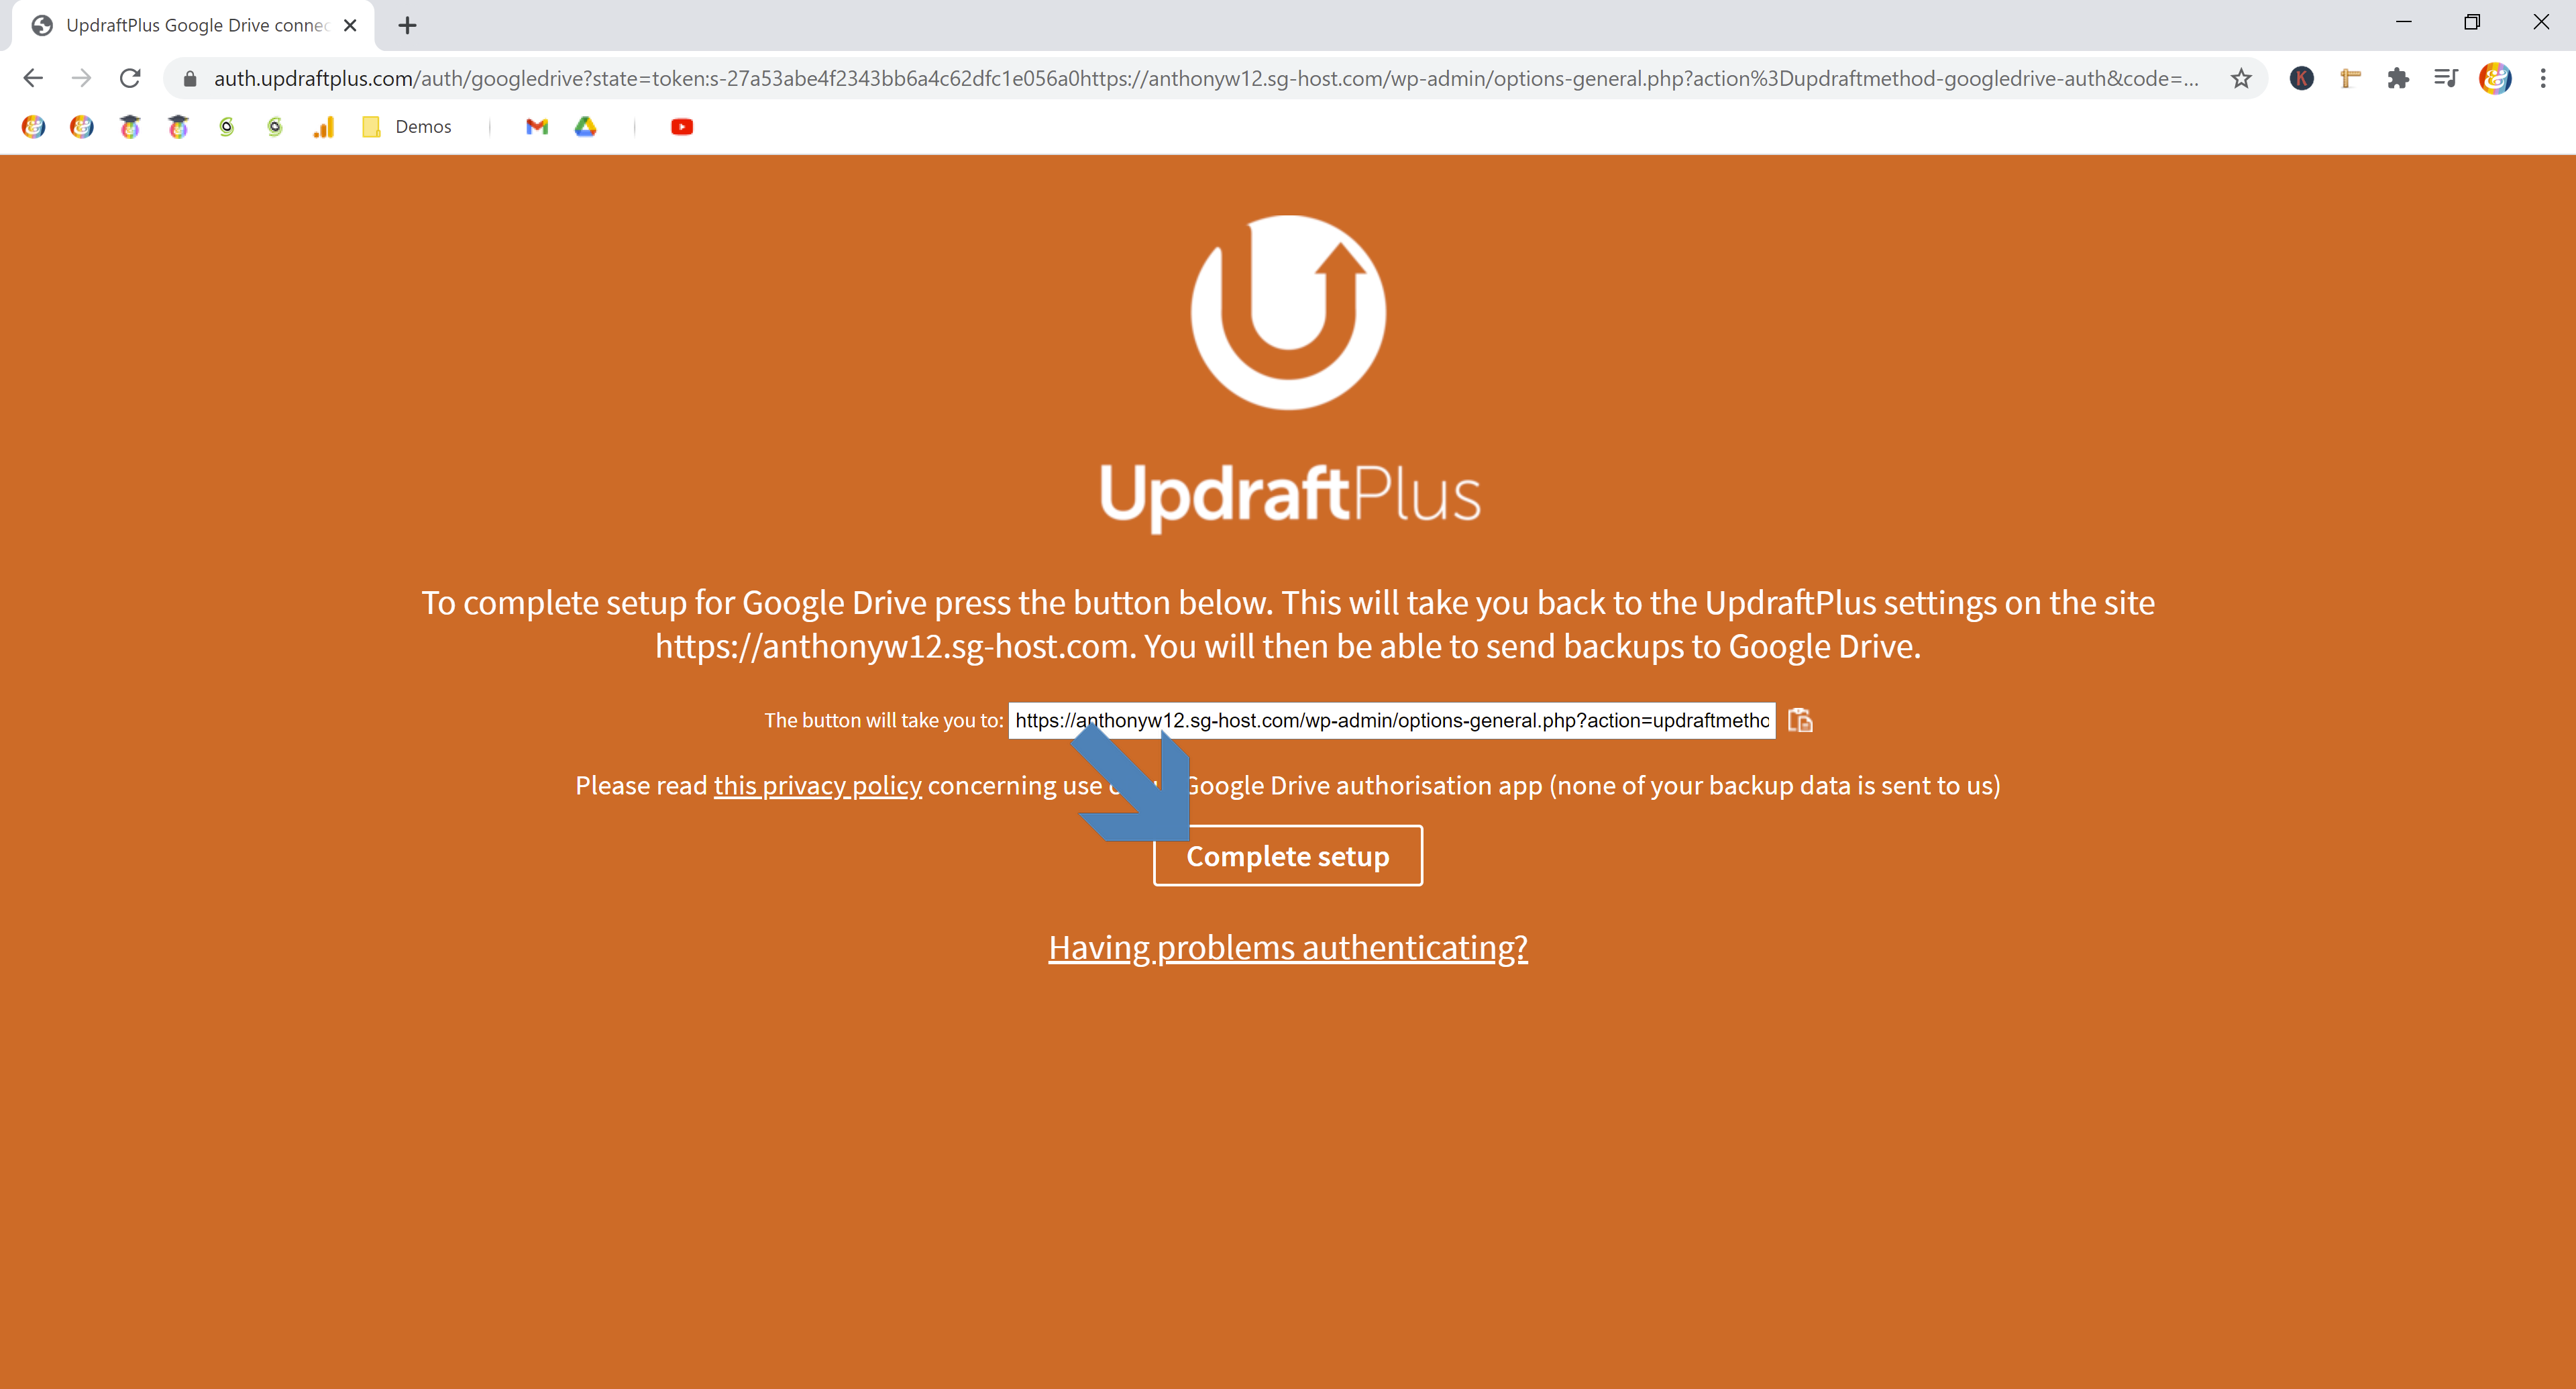
You’ll be redirected to a Google sign-in form. Follow the prompts to authenticate with your Google account.
⚠ Note: If you don’t already have a Google account, you’ll need to create a free account before continuing.
Once you’ve allowed all of the permissions, you’ll land on a page which looks like this. Click Complete setup.
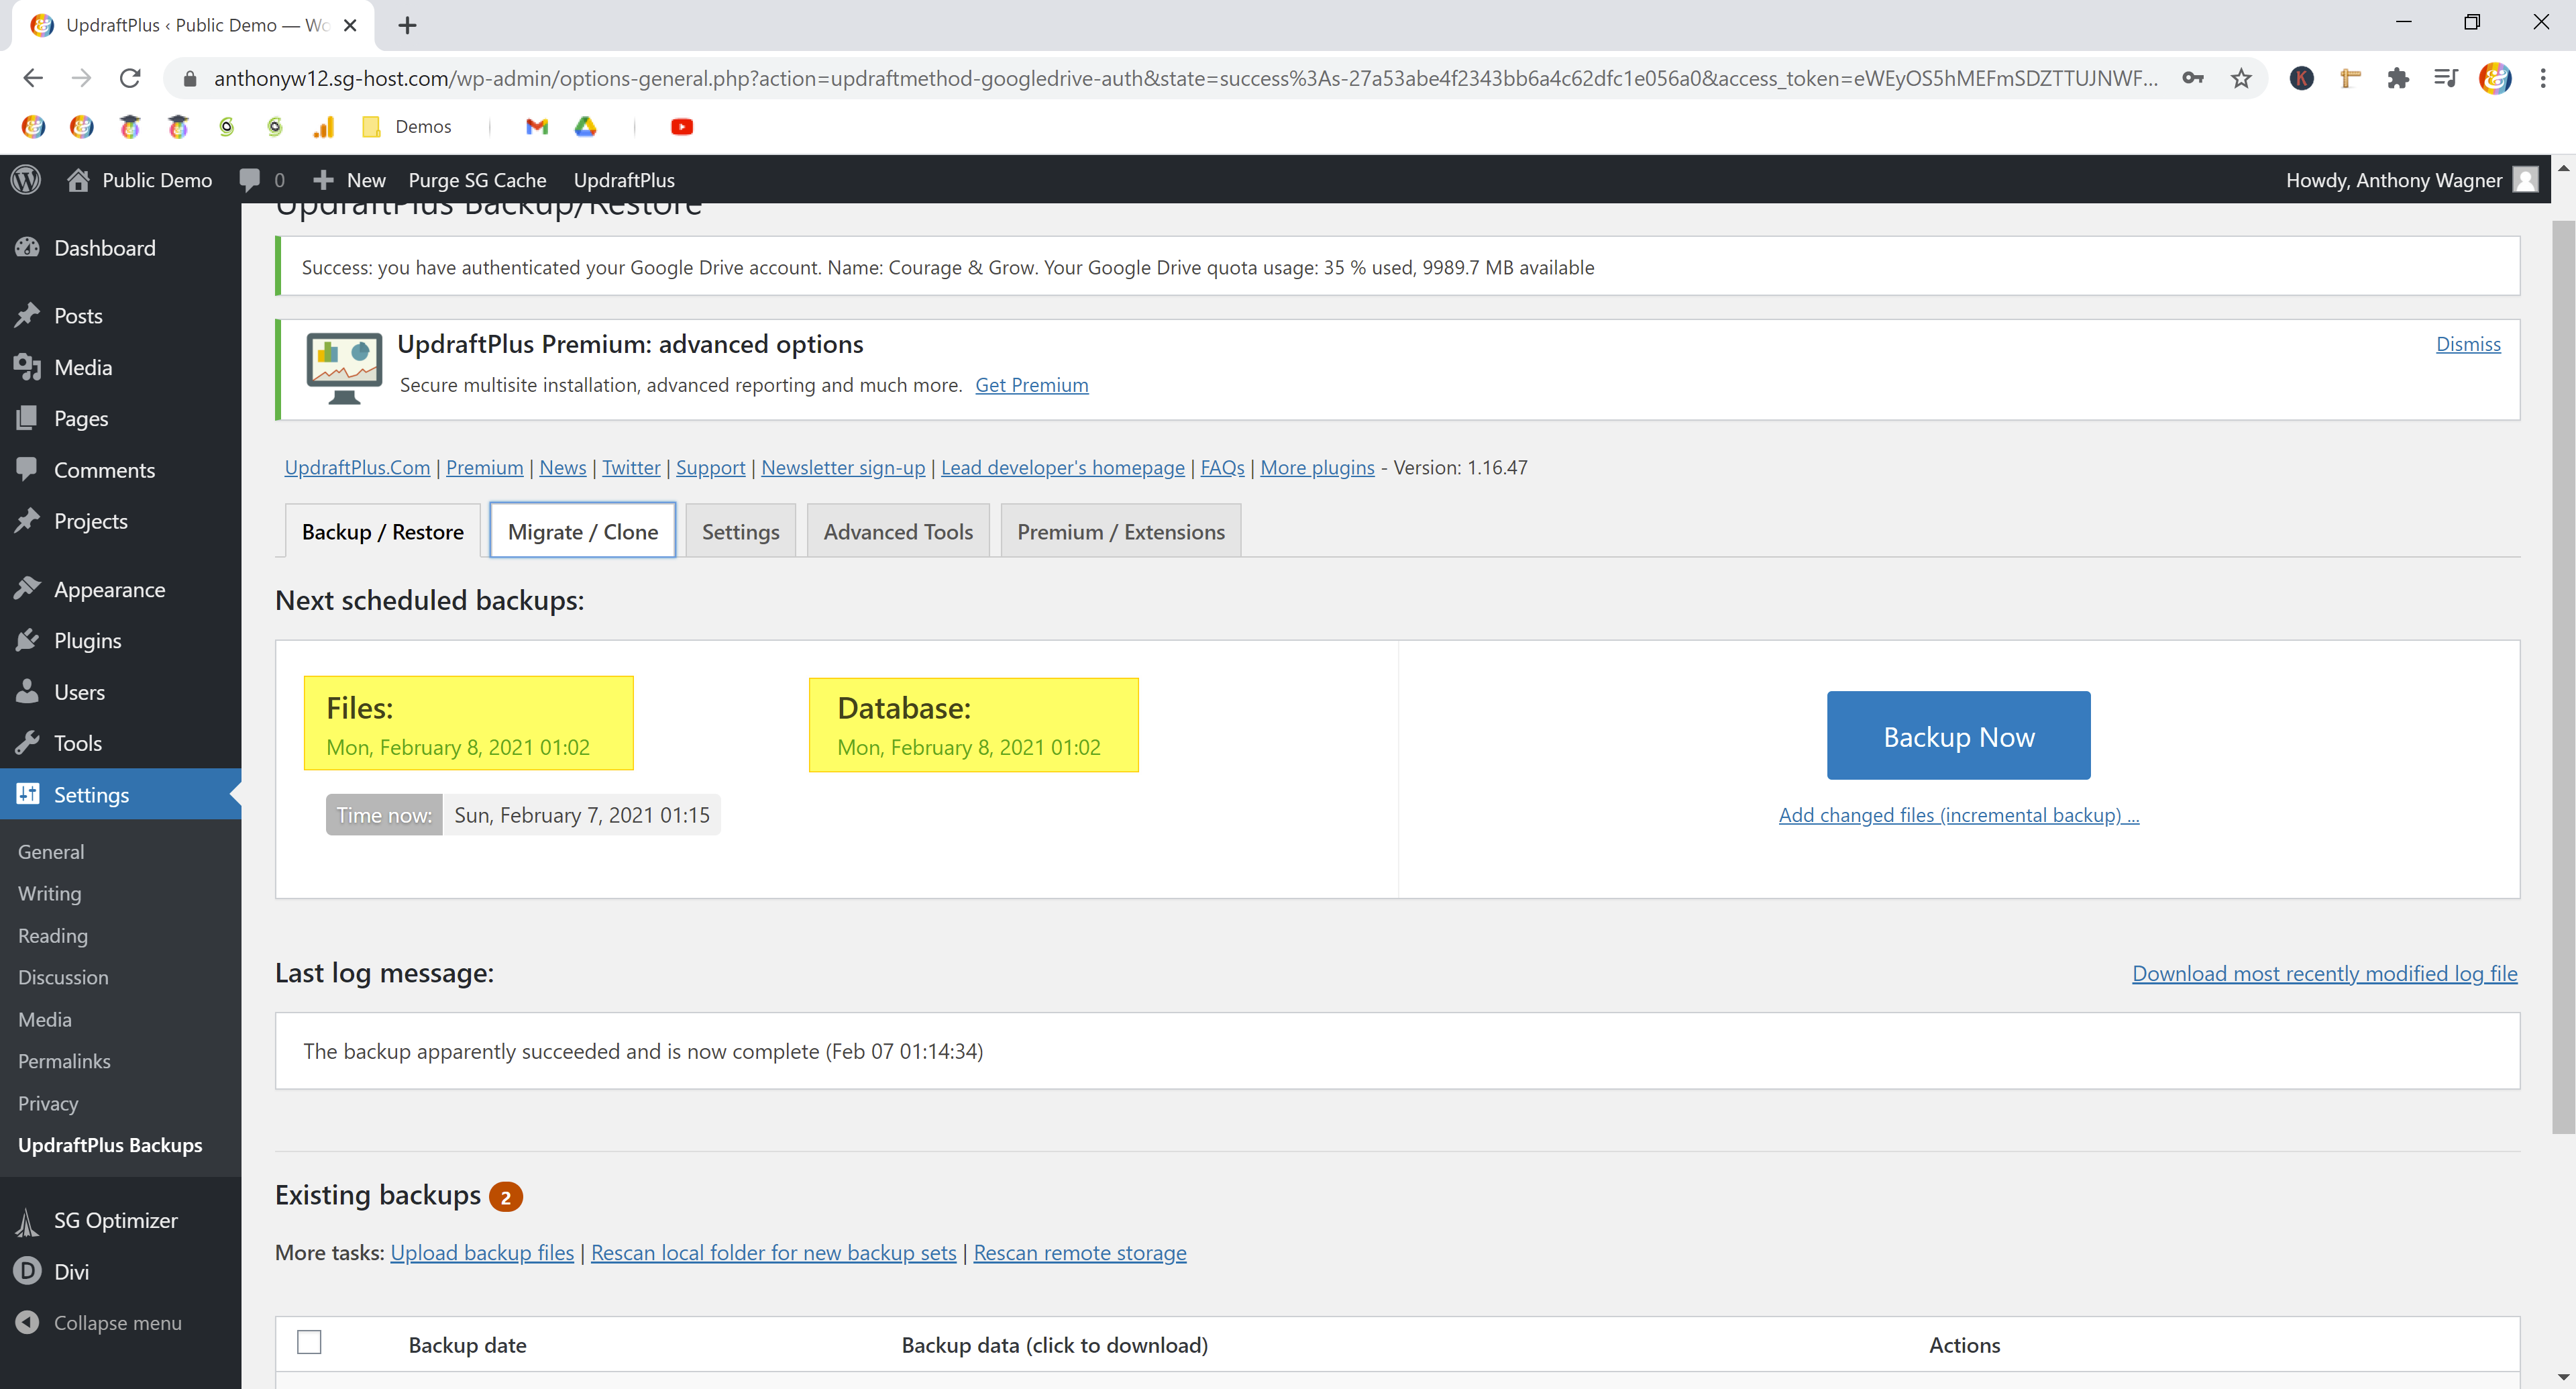
You’ll be redirected back to the main UpdraftPlus settings page where a backup should kick off immediately.
If it doesn’t (or if you’re not sure), click the Backup Now button to start one manually.
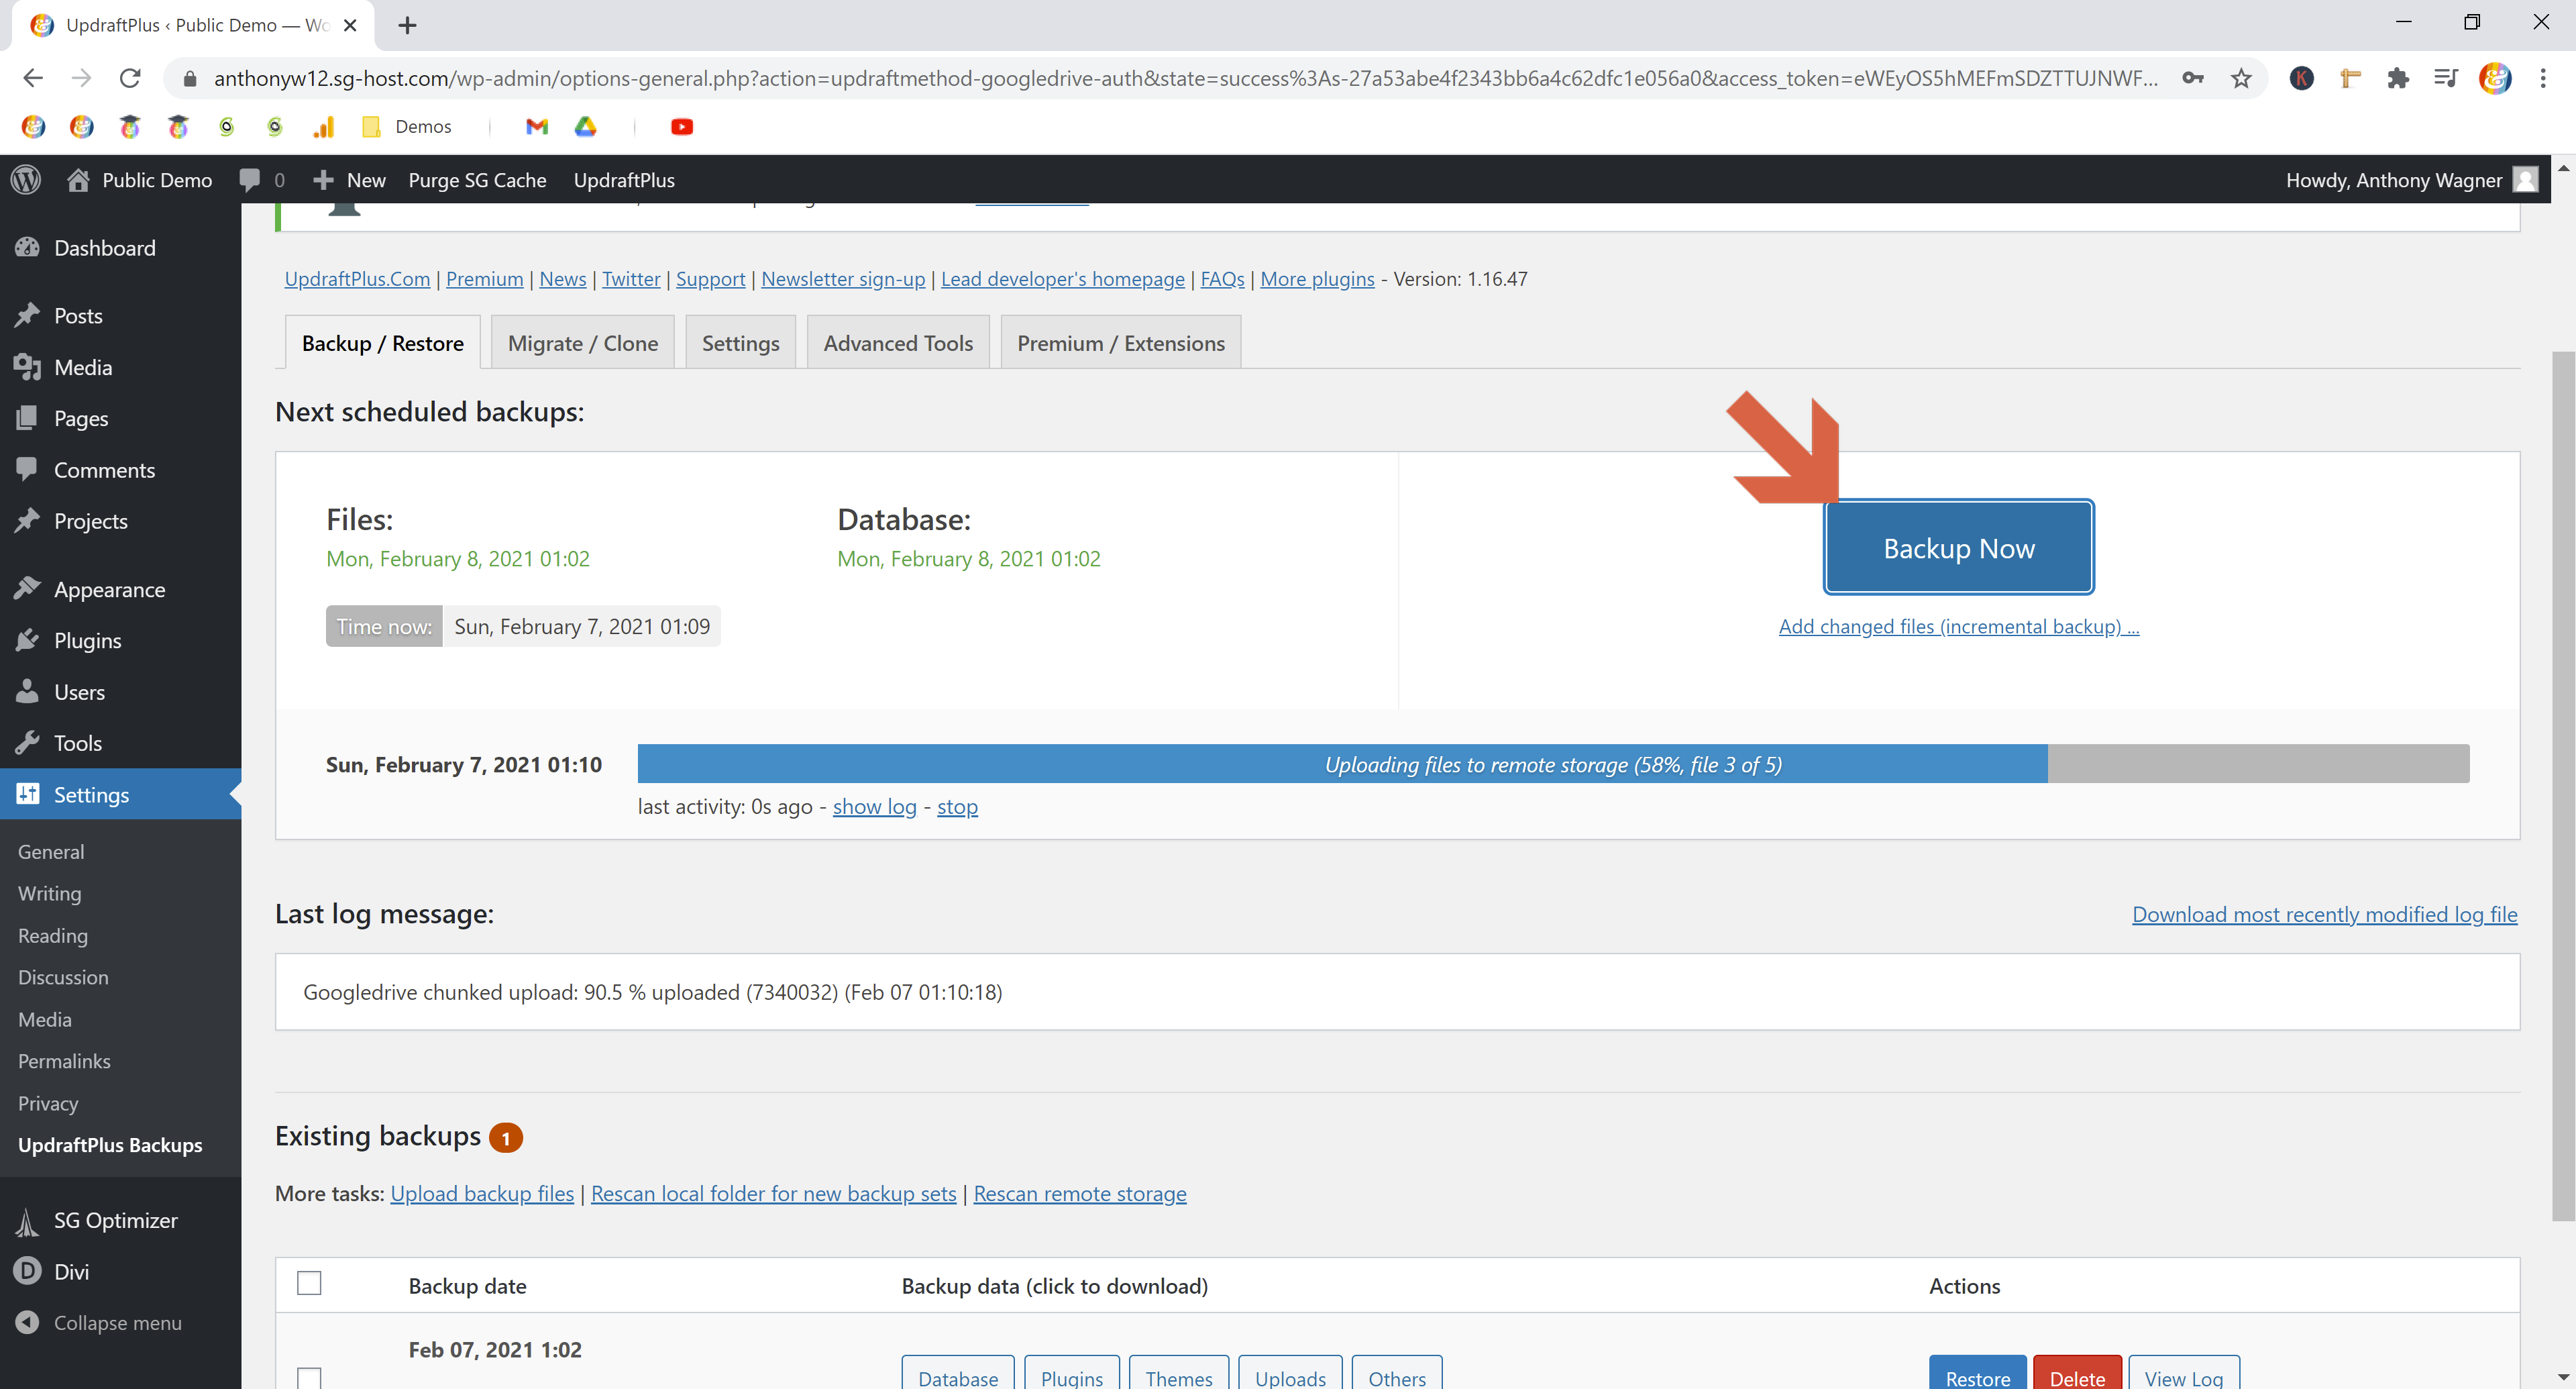
In the next prompt, leave the default options, and click Backup Now.
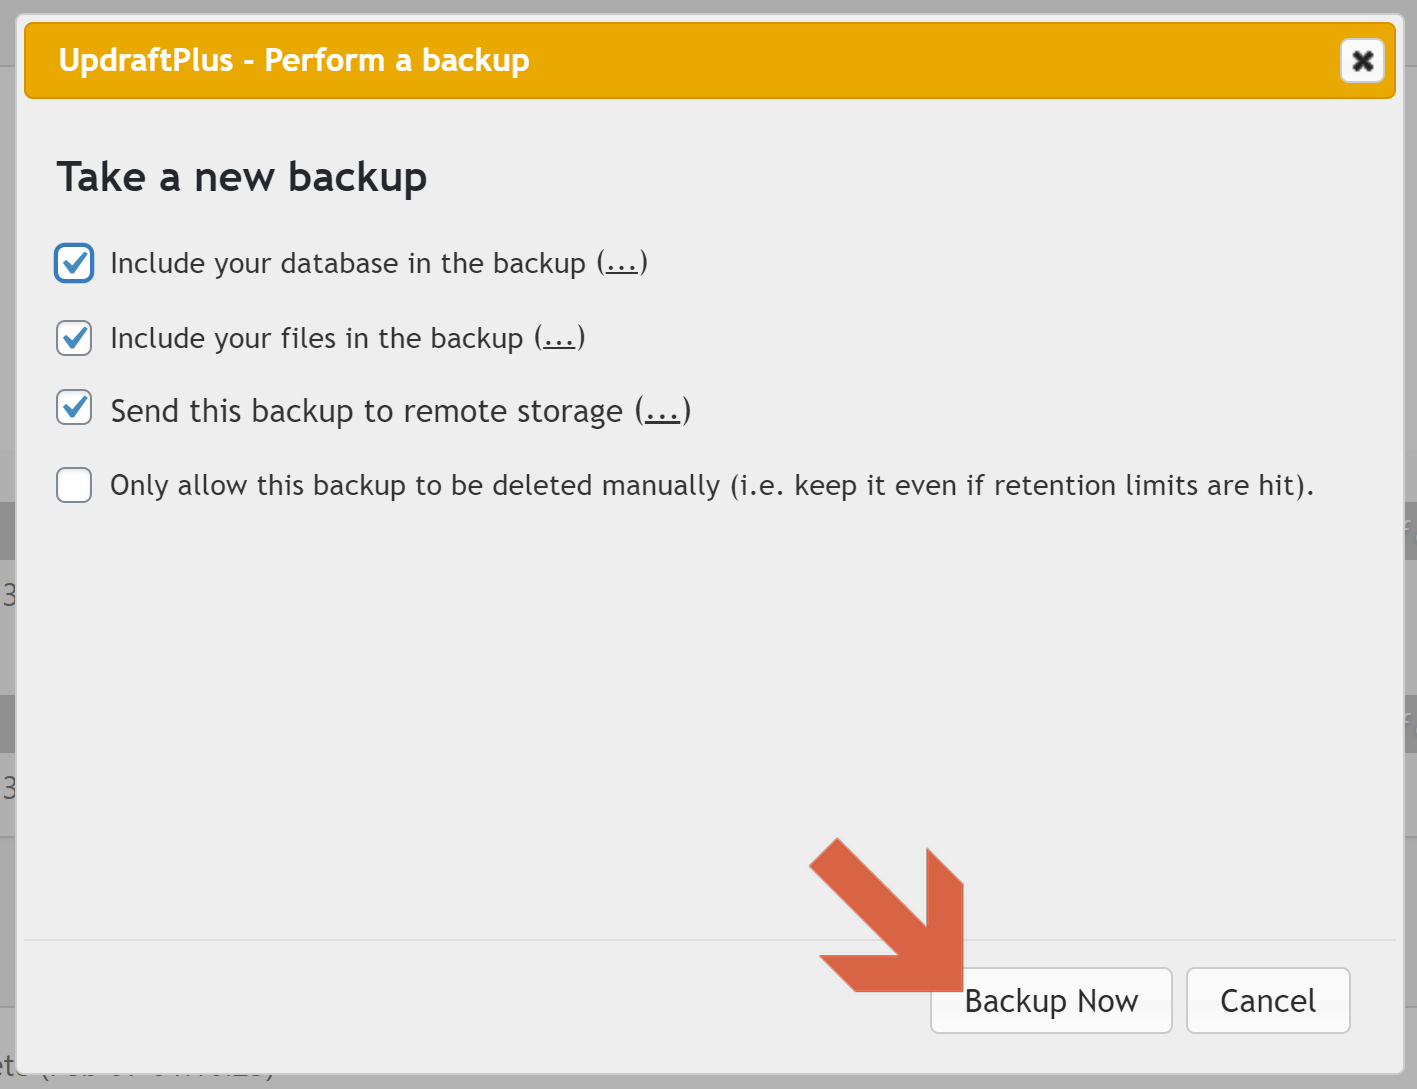
That’ll kick off your first backup.
Step 5. Verify your backups are running and transferring as expected
Once it’s complete, head over to your Google Drive account, and verify that it made it.
If it did, you’re all set!
Your next backup should run at the time specified in the main UpdraftPlus settings page.
In my case, UpdraftPlus automatically selected 1:02am (in my site’s timezone).
⚠ Note: As I mentioned above, if you want to change this time, you’ll need to upgrade to the paid version of UpdraftPlus.
I’d recommend going back to Google Drive 24 hours after the first backup completes (or any time after your scheduled time) and verifying the scheduled one completed successfully.
Still stuck? Leave a comment!
If you’ve tried setting up an automatic WordPress backup with these steps and you’re still stuck, give me a shout in the comments below.
I will try my best to help guide you!
And, if the problem is bigger than the scope of the comments section, we can chat one-on-one about additional steps for setting up the automatic WordPress backups. In this case, head over to the Contact page and drop me a note!


0 Comments