


At a glance
If you’ve heard that you shouldn’t upload huge images to your site, you’ve heard correctly. The issue is: how to optimize images for web without losing quality.
Here’s a quick, free method.
But first, a couple key things to understand:
Ideal image file size
Images that are too big (in terms of their file size) are a huge contributor to pages that load slowly. And slow loading = lost traffic = lost money.
So, how big should your images be?
- Image file sizes should be no larger than 500 KB
- Anything smaller than 300 KB is excellent
Ideal image dimensions
The larger an image is (in terms of resolution — i.e., width x height), the larger the file size. Which, as was just mentioned, can make pages load slowly.
I wish I could just give you a single size and call it a day. But, the dimensions your images should be is more nuanced than that.
In general, there are a few guidelines to follow:
- File size must remain under 500 KB
- Images should be JPG (unless transparency is necessary, then use PNG)
- If the image will take up the full screen on a desktop browser, then it should be 1920×1280
- Otherwise, the image should be the size of its container and no larger. If you want detailed help figuring this out, Flothemes has an amazing, step-by-step article!
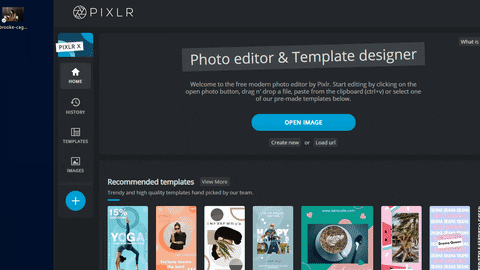
1 of 2 // Resize a large image in Pixlr X
Pixlr X is a free tool that’ll allow you to resize your image in just a couple of clicks.
Step 1.1: Go to Pixlr X
Step 1.2: Upload and resize the image
Drag and drop your original image anywhere on the site. (You don’t even have to create an account or log in!)
Then, when the Pre-resize prompt appears, leave the 1920×1280 option selected, and click Apply.
2 of 2 // Download the optimized image from Pixlr X
Pixlr X will also allow you to download an optimized version of your image!
Step 2.1: Download the image
Once your image is uploaded, click Save.
Then, in the prompt that appears, ensure JPG is selected, change the Quality to 80%, and then click Download.

As you can see in the gif, it’s a good idea to confirm the file size before downloading.
Again, 500 KB is the max file size. But, anything under 300 KB is great!
Check it on your site
Now that you’ve got your optimized image, it’s a good idea to upload it to your site. Then, preview it on the front end to confirm it looks the way you want.
Others? Questions?
Have questions about how to optimize images for web without losing quality?
Or, maybe you’ve got a better way to do it?
Drop a note in the comments below and let me know!


0 Comments